CLONING AND ANALYSIS OF λ - University of Kentuckyjrawls/bio410/LAB MANUALlrb.pdf · CLONING AND...
20
CLONING AND ANALYSIS OF λ BACTERIOPHAGE DNA Recombinant gene cloning involves inserting DNA fragments into a vector and selecting for the desired fragment-vector combination. Vectors can be plasmids or viruses, usually of E. coli, that will faithfully replicate the desired clone to provide large quantities of cloned DNA that can then be purified and studied. Of course, great cleverness (and, usually, hard work) is required to select a desired clone from among the many clones generated in most experiments, and those approaches have provided the basis for a technology that has revolutionized experimental biology. Among the "tools" used to perform recombinant gene cloning are a number of important enzymes (e.g., restriction endonucleases, DNA ligase) and bacterial genetics techniques (transformation, antibiotic resistance selection, other selection methods (Griffiths, et al., 2002, Chapter 8; Karp, 2002, Chapter 18). In this series of experiments, you will prepare a genomic library of a very simple genome, the 48.5 kb chromosome of bacteriophage λ. Fig. 1 presents maps of the λ chromosome, including the location of important genes, a scale in base pairs of DNA, and sites for a variety of restriction endonucleases. At each end of the map is the 12-base complementary, single- stranded cos site that is essential for phage packaging and permits circularization of the chromosome during replication and integration (Karp, 2002; Griffiths, et al., 2002). Table 1 shows locations of restriction sites along the λ chromosome. As vector, you will use the elegantly engineered E. coli plasmid pBS (plasmid Bluescript II SK (+/-) phagemid)(Fig. 2). In addition to an origin of replication (ColE1 origin) that permits maintenance of this plasmid in E. coli, this vector contains an Amp R (ampicillin resistance) gene that permits antibiotic selection of cells containing the plasmid and a lacZ-polylinker cassette that facilitates cloning of inserted DNA fragments. The lacZ-polylinker consists of a segment of the E. coli lacZ gene that, in an appropriate host cell (e.g., the DH5α strain that contains a lacZ mutation), directs synthesis of β-galactosidase through α-complementation of the polypeptides provided by the lacZ genes in pBS and the host cell. Colonies expressing β-galactosidase (i.e., containing a plasmid) can be readily detected by histochemically staining with the chromagen X- gal. Within the polypeptide open reading frame of the pBS lacZ gene, a restriction polylinker sequence (MCS) has been engineered, containing a variety of restriction sites into which DNA fragments can be inserted. Insertion of DNA into those sites will interrupt the lacZ open reading frame, blocking synthesis of β-galactosidase, preventing colony staining with X-gal (colonies containing inserts in pBS will be colorless/white; colonies without inserts will be blue). You will digest λ DNA with appropriate restriction enzymes and randomly insert restricted fragments into pBS, then clones will be selected as antibiotic-resistant bacterial colonies. You will characterize your clone(s) by restriction analysis and by hybridization analysis, to determine which portions of the λ chromosome are represented in your clones. References Griffiths, A., W. Gelbart, J. Miller & R. Lewontin (2002) Modern Genetic Analysis. W.H. Freeman, San Francisco. [or another contemporary introductory genetics text] Karp, G. (2002) Cell and Molecular Biology, 3 rd edition. John Wiley & Sons, Inc., NY. [or another contemporary introductory cell biology text] 5
Transcript of CLONING AND ANALYSIS OF λ - University of Kentuckyjrawls/bio410/LAB MANUALlrb.pdf · CLONING AND...
CLONING AND ANALYSIS OF λ BACTERIOPHAGE DNA
Recombinant gene cloning involves inserting DNA fragments into a vector and selecting for the desired fragment-vector combination. Vectors can be plasmids or viruses, usually of E. coli, that will faithfully replicate the desired clone to provide large quantities of cloned DNA that can then be purified and studied. Of course, great cleverness (and, usually, hard work) is required to select a desired clone from among the many clones generated in most experiments, and those approaches have provided the basis for a technology that has revolutionized experimental biology. Among the "tools" used to perform recombinant gene cloning are a number of important enzymes (e.g., restriction endonucleases, DNA ligase) and bacterial genetics techniques (transformation, antibiotic resistance selection, other selection methods (Griffiths, et al., 2002, Chapter 8; Karp, 2002, Chapter 18).
In this series of experiments, you will prepare a genomic library of a very simple genome, the 48.5 kb chromosome of bacteriophage λ. Fig. 1 presents maps of the λ chromosome, including the location of important genes, a scale in base pairs of DNA, and sites for a variety of restriction endonucleases. At each end of the map is the 12-base complementary, single-stranded cos site that is essential for phage packaging and permits circularization of the chromosome during replication and integration (Karp, 2002; Griffiths, et al., 2002). Table 1 shows locations of restriction sites along the λ chromosome.
As vector, you will use the elegantly engineered E. coli plasmid pBS (plasmid Bluescript II SK (+/-) phagemid)(Fig. 2). In addition to an origin of replication (ColE1 origin) that permits maintenance of this plasmid in E. coli, this vector contains an AmpR (ampicillin resistance) gene that permits antibiotic selection of cells containing the plasmid and a lacZ-polylinker cassette that facilitates cloning of inserted DNA fragments. The lacZ-polylinker consists of a segment of the E. coli lacZ gene that, in an appropriate host cell (e.g., the DH5α strain that contains a lacZ mutation), directs synthesis of β-galactosidase through α-complementation of the polypeptides provided by the lacZ genes in pBS and the host cell. Colonies expressing β-galactosidase (i.e., containing a plasmid) can be readily detected by histochemically staining with the chromagen X-gal. Within the polypeptide open reading frame of the pBS lacZ gene, a restriction polylinker sequence (MCS) has been engineered, containing a variety of restriction sites into which DNA fragments can be inserted. Insertion of DNA into those sites will interrupt the lacZ open reading frame, blocking synthesis of β-galactosidase, preventing colony staining with X-gal (colonies containing inserts in pBS will be colorless/white; colonies without inserts will be blue).
You will digest λ DNA with appropriate restriction enzymes and randomly insert restricted fragments into pBS, then clones will be selected as antibiotic-resistant bacterial colonies. You will characterize your clone(s) by restriction analysis and by hybridization analysis, to determine which portions of the λ chromosome are represented in your clones. References Griffiths, A., W. Gelbart, J. Miller & R. Lewontin (2002) Modern Genetic Analysis. W.H. Freeman, San Francisco. [or another contemporary introductory genetics text] Karp, G. (2002) Cell and Molecular Biology, 3rd edition. John Wiley & Sons, Inc., NY. [or another contemporary introductory cell biology text]
5
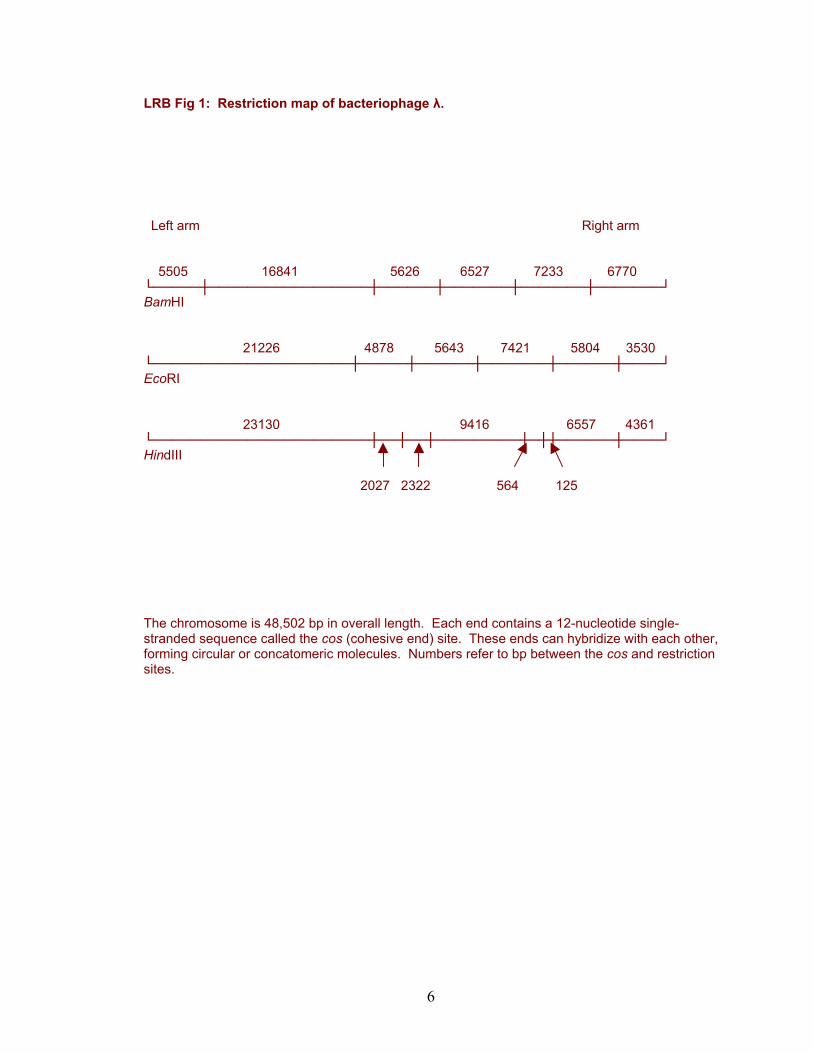
LRB Fig 1: Restriction map of bacteriophage λ.
Left arm Right arm 5505 16841 5626 6527 7233 6770 └─────┼─────────────────┼──────┼───────┼───────┼───────┘ BamHI
21226 4878 5643 7421 5804 3530
└─────────────────────┼─────┼──────┼───────┼──────┼────┘ EcoRI
23130 9416 6557 4361
└───────────────────────┼──┼──┼─────────┼─┼┼──────┼────┘ HindIII 2027 2322 564 125
The chromosome is 48,502 bp in overall length. Each end contains a 12-nucleotide single-stranded sequence called the cos (cohesive end) site. These ends can hybridize with each other, forming circular or concatomeric molecules. Numbers refer to bp between the cos and restriction sites.
6
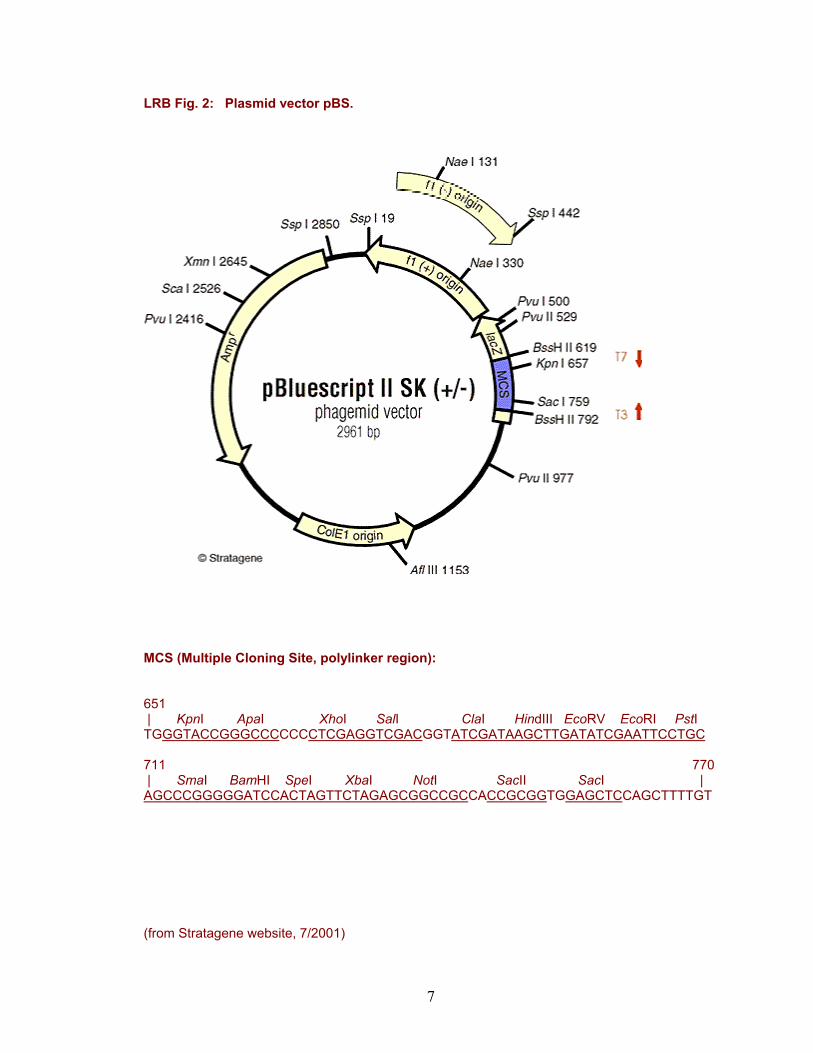
LRB Fig. 2: Plasmid vector pBS.
MCS (Multiple Cloning Site, polylinker region): 651 | KpnI ApaI XhoI SalI ClaI HindIII EcoRV EcoRI PstI TGGGTACCGGGCCCCCCCTCGAGGTCGACGGTATCGATAAGCTTGATATCGAATTCCTGC 711 770 | SmaI BamHI SpeI XbaI NotI SacII SacI | AGCCCGGGGGATCCACTAGTTCTAGAGCGGCCGCCACCGCGGTGGAGCTCCAGCTTTTGT (from Stratagene website, 7/2001)
7
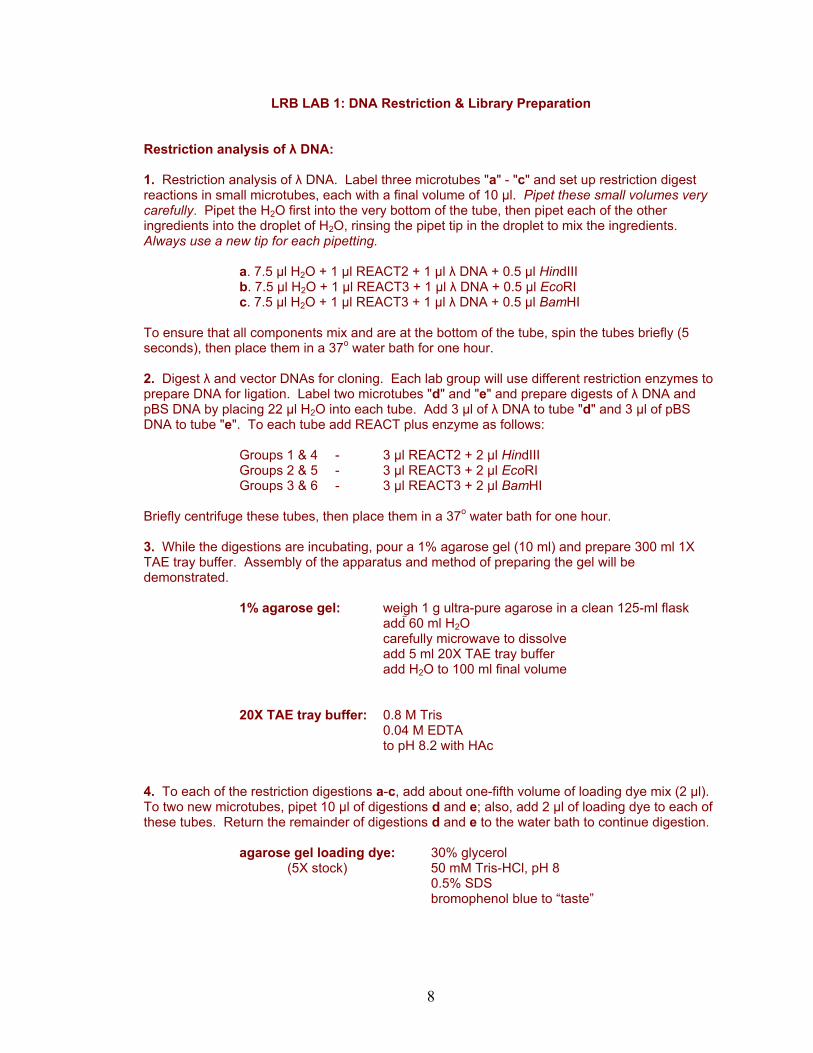
LRB LAB 1: DNA Restriction & Library Preparation Restriction analysis of λ DNA: 1. Restriction analysis of λ DNA. Label three microtubes "a" - "c" and set up restriction digest reactions in small microtubes, each with a final volume of 10 µl. Pipet these small volumes very carefully. Pipet the H2O first into the very bottom of the tube, then pipet each of the other ingredients into the droplet of H2O, rinsing the pipet tip in the droplet to mix the ingredients. Always use a new tip for each pipetting.
a. 7.5 µl H2O + 1 µl REACT2 + 1 µl λ DNA + 0.5 µl HindIII b. 7.5 µl H2O + 1 µl REACT3 + 1 µl λ DNA + 0.5 µl EcoRI c. 7.5 µl H2O + 1 µl REACT3 + 1 µl λ DNA + 0.5 µl BamHI
To ensure that all components mix and are at the bottom of the tube, spin the tubes briefly (5 seconds), then place them in a 37o water bath for one hour. 2. Digest λ and vector DNAs for cloning. Each lab group will use different restriction enzymes to prepare DNA for ligation. Label two microtubes "d" and "e" and prepare digests of λ DNA and pBS DNA by placing 22 µl H2O into each tube. Add 3 µl of λ DNA to tube "d" and 3 µl of pBS DNA to tube "e". To each tube add REACT plus enzyme as follows:
Groups 1 & 4 - 3 µl REACT2 + 2 µl HindIII Groups 2 & 5 - 3 µl REACT3 + 2 µl EcoRI Groups 3 & 6 - 3 µl REACT3 + 2 µl BamHI
Briefly centrifuge these tubes, then place them in a 37o water bath for one hour. 3. While the digestions are incubating, pour a 1% agarose gel (10 ml) and prepare 300 ml 1X TAE tray buffer. Assembly of the apparatus and method of preparing the gel will be demonstrated.
1% agarose gel: weigh 1 g ultra-pure agarose in a clean 125-ml flask add 60 ml H2O carefully microwave to dissolve add 5 ml 20X TAE tray buffer add H2O to 100 ml final volume
20X TAE tray buffer: 0.8 M Tris 0.04 M EDTA to pH 8.2 with HAc
4. To each of the restriction digestions a-c, add about one-fifth volume of loading dye mix (2 µl). To two new microtubes, pipet 10 µl of digestions d and e; also, add 2 µl of loading dye to each of these tubes. Return the remainder of digestions d and e to the water bath to continue digestion.
agarose gel loading dye: 30% glycerol (5X stock) 50 mM Tris-HCl, pH 8
0.5% SDS bromophenol blue to “taste”
8
5. Using a P-20, load the gel with these dyed samples: up to 12 µl per well for samples a-c; all of the samples d and e; 5 µl of BRL Ladder marker mix. 6. Place the lid on the gel box, connect the cables to the power supply, turn on, set the power supply to read “milliamps”, and adjust the power to:
10 mA until the bromphenol blue moves out of the wells, then 60 mA until the dye has moved 75% the length of the gel.
7. Turn off the power, disconnect the cables, remove the gel and place it in ethidium bromide solution. Agitate gently for 10 min. Ethidium bromide is a hazardous reagent. Use gloves. 8. Move your gel to a tray of H2O and photograph it with a fluorescent ruler to measure distances. Use of the photodocumentation camera system will be demonstrated. 9. Study the gel, consulting the λ restriction map (Fig. 1).
a. Lanes a-c should represent the fragments created by restriction with HindIII (a), EcoRI (b), and BamHI (c). Can you identify each of the predicted fragments?
b. Lanes d and e should show you the completeness of digestion of λ and pBS DNAs with EcoRI (lane e should be the same as lane b). Estimate the relative concentrations of DNA in lanes d and e by comparing the intensities of the ethidium bromide staining in those two lanes. You will use this observation to determine the ratio of DNA from restriction tubes d and e to use in preparing a library of λ EcoRI fragments in Step 14.
Preparing a Southern blot of your gel: A Southern blot is a nitrocellulose membrane replica of an agarose gel, permitting hybridization of labelled nucleic acids to DNA bound to the membrane. Only single-stranded nucleic acids bind to nitrocellulose, so DNA within the gel must be denatured before transfer to the membrane. 10. Denature the DNA in your gel by placing it in a bath of denaturing solution. Gently agitate at room temperature for 20 min.
Denaturing solution: 0.5 M NaOH 1.5 M NaCl
While this and subsequent steps are being carried out, you should go to step #14 and set up the ligation reaction. 11. Neutralize the gel, maintaining high salt (to prevent renaturation of the DNA), by quickly rinsing it with H2O and placing it in a bath of neutralizing solution. Gently agitate at room temperature for 20 min.
Neutralizing solution: 0.5 M Tris-HCl, pH 7.5
1.5 M NaCl
9
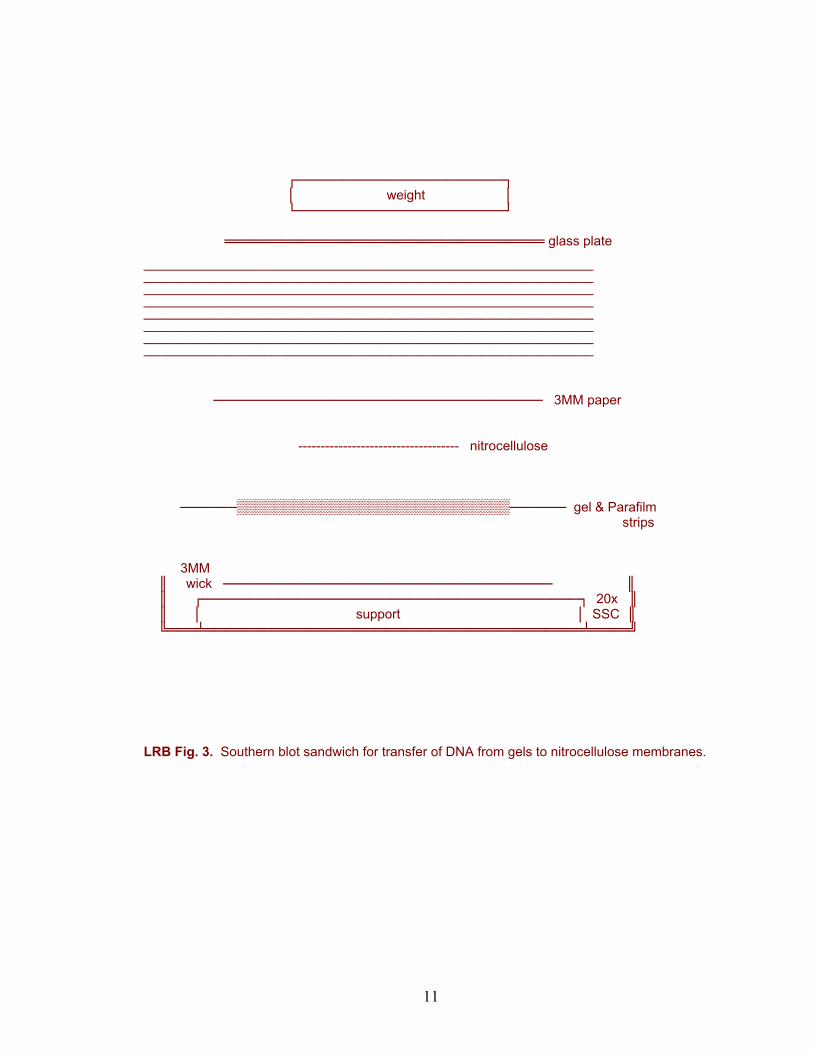
12. Prepare a transfer sandwich of the gel, a nitrocellulose membrane, and absorbent paper, mounted on a wicking system to permit slow percolation of 20X SSC through the sandwich (Fig. 3). Assembly of this system will be demonstrated. Handle nitrocellulose with gloves and/or forceps only. Allow the transfer to proceed at room temperature overnight.
20X SSC: 3 M NaCl 0.3 M sodium citrate to pH 7 with HCl
13. Next day, remove the nitrocellulose membrane from the assembly. Dry. Bake 2 hr at 80o under vacuum. Store until Lab 4. Preparing a library of λ DNA fragments: Ligation of compatible, cohesive DNA ends is a random, time-dependent reaction. We will carry out ligation under relatively high DNA concentrations, such that the frequency of joining of any two ends in solution will be largely determined by the concentration of those ends (i.e., the likelihood that chance encounters will occur in solution). We want to encourage insertion of single λ fragments into single plasmid molecules. In general practice, this is optimized by using an excess of insert fragments (measured as ends) to plasmid. 14. Based upon your observation of the gel in step 9, add to tube e an appropriate volume from tube d that provides a 20-fold excess of tube d DNA fragments. Add TE buffer to a total volume of 100 µl. The following steps will purify your DNA away from the restriction enzyme.
TE buffer: 10 mM Tris-HCl, pH 8 1 mM EDTA
15. Extract your sample by adding an equal volume of phenol/chloroform (1:1) and vortexing vigorously. Centrifuge for 2 min at max speed. 16. Using a P-200, draw the aqueous phase (upper) to a new microtube and extract with an equal volume of chloroform. Centrifuge for 2 min at max speed. 17. Draw the aqueous phase (upper) to a new microtube. Estimate the volume of your sample with the Pipetman. Add 5M NaCl to give a final concentration of 0.2 M NaCl. Add two volumes of ethanol. Place at -20o for 20 min to allow precipitation of the DNA. 18. Centrifuge 15 min at maximum speed. Discard the supernatant. Dry the pellet. 19. Dissolve the pellet in 7 µl H2O. Add 2 µl 5X ligase buffer (provided by the supplier, BRL); mix. Add 1 µl T4 DNA ligase. Place your sample at 4o until the next lab.
10
┌──────────────────────┐ │ weight │
└──────────────────────┘
══════════════════════════════════ glass plate
──────────────────────────────────────────────────────────── ──────────────────────────────────────────────────────────── ──────────────────────────────────────────────────────────── ──────────────────────────────────────────────────────────── ──────────────────────────────────────────────────────────── ──────────────────────────────────────────────────────────── ──────────────────────────────────────────────────────────── ──────────────────────────────────────────────────────────── ─────────────────────────────────── 3MM paper
------------------------------------ nitrocellulose ──────▒▒▒▒▒▒▒▒▒▒▒▒▒▒▒▒▒▒▒▒▒▒▒▒▒▒▒▒▒────── gel & Parafilm
strips 3MM ║ wick ─────────────────────────────────── ║ ║ ┌────────────────────────────────────────┐ 20x ║ ║ │ support │ SSC ║ ╚═══╧════════════════════════════════════════╧════╝
LRB Fig. 3. Southern blot sandwich for transfer of DNA from gels to nitrocellulose membranes.
11
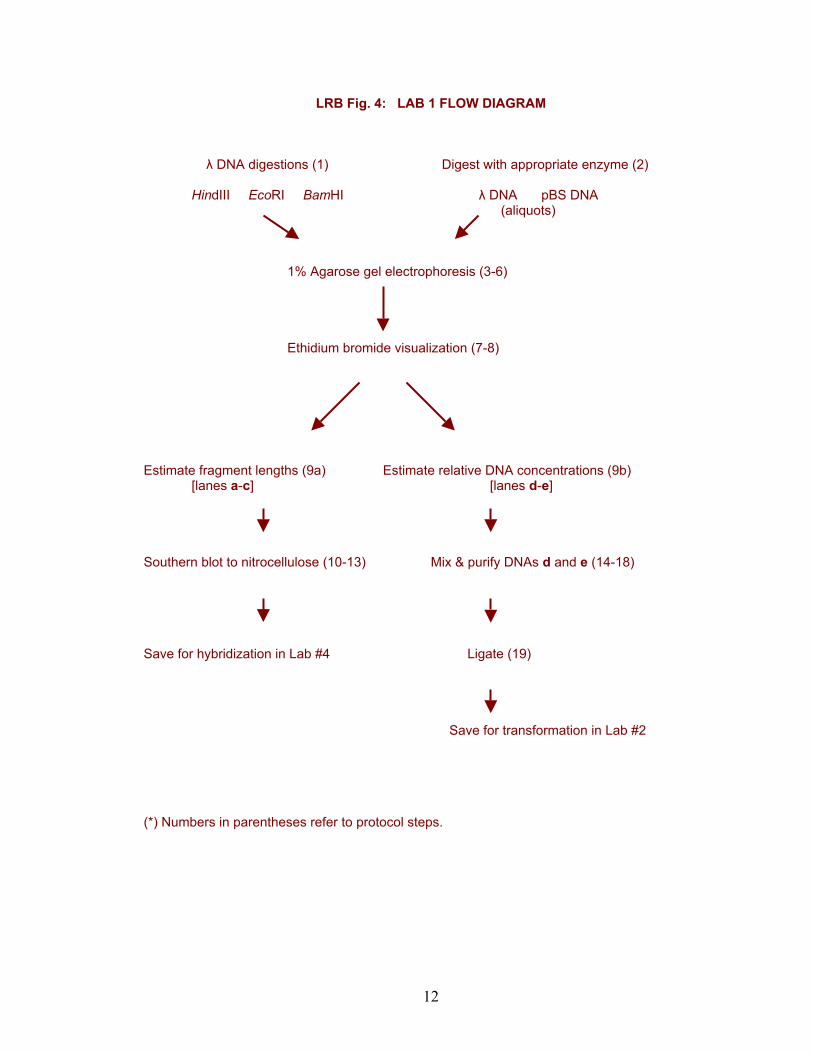
LRB Fig. 4: LAB 1 FLOW DIAGRAM
λ DNA digestions (1) Digest with appropriate enzyme (2)
HindIII EcoRI BamHI λ DNA pBS DNA (aliquots)
1% Agarose gel electrophoresis (3-6)
Ethidium bromide visualization (7-8)
Estimate fragment lengths (9a) Estimate relative DNA concentrations (9b)
[lanes a-c] [lanes d-e]
Southern blot to nitrocellulose (10-13) Mix & purify DNAs d and e (14-18)
Save for hybridization in Lab #4 Ligate (19)
Save for transformation in Lab #2 (*) Numbers in parentheses refer to protocol steps.
12
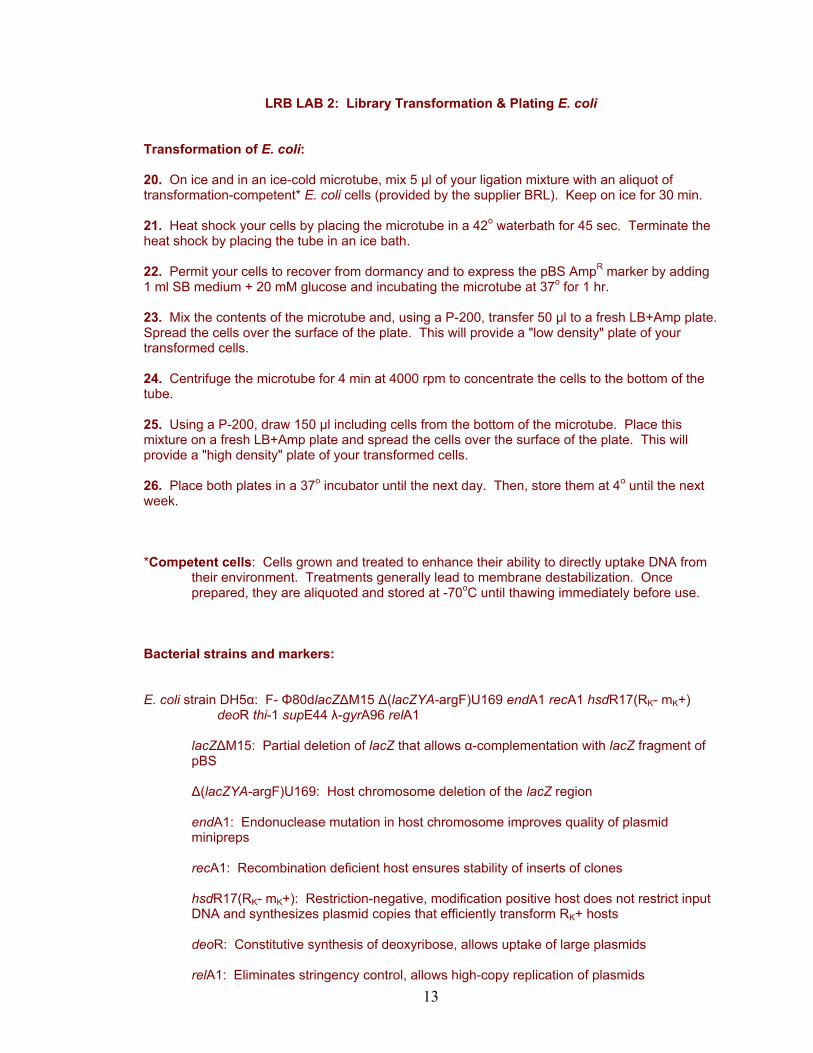
LRB LAB 2: Library Transformation & Plating E. coli Transformation of E. coli: 20. On ice and in an ice-cold microtube, mix 5 µl of your ligation mixture with an aliquot of transformation-competent* E. coli cells (provided by the supplier BRL). Keep on ice for 30 min. 21. Heat shock your cells by placing the microtube in a 42o waterbath for 45 sec. Terminate the heat shock by placing the tube in an ice bath. 22. Permit your cells to recover from dormancy and to express the pBS AmpR marker by adding 1 ml SB medium + 20 mM glucose and incubating the microtube at 37o for 1 hr. 23. Mix the contents of the microtube and, using a P-200, transfer 50 µl to a fresh LB+Amp plate. Spread the cells over the surface of the plate. This will provide a "low density" plate of your transformed cells. 24. Centrifuge the microtube for 4 min at 4000 rpm to concentrate the cells to the bottom of the tube. 25. Using a P-200, draw 150 µl including cells from the bottom of the microtube. Place this mixture on a fresh LB+Amp plate and spread the cells over the surface of the plate. This will provide a "high density" plate of your transformed cells. 26. Place both plates in a 37o incubator until the next day. Then, store them at 4o until the next week. *Competent cells: Cells grown and treated to enhance their ability to directly uptake DNA from
their environment. Treatments generally lead to membrane destabilization. Once prepared, they are aliquoted and stored at -70oC until thawing immediately before use.
Bacterial strains and markers: E. coli strain DH5α: F- Φ80dlacZ∆M15 ∆(lacZYA-argF)U169 endA1 recA1 hsdR17(RK- mK+) deoR thi-1 supE44 λ-gyrA96 relA1
lacZ∆M15: Partial deletion of lacZ that allows α-complementation with lacZ fragment of pBS ∆(lacZYA-argF)U169: Host chromosome deletion of the lacZ region
endA1: Endonuclease mutation in host chromosome improves quality of plasmid minipreps
recA1: Recombination deficient host ensures stability of inserts of clones
hsdR17(RK- mK+): Restriction-negative, modification positive host does not restrict input DNA and synthesizes plasmid copies that efficiently transform RK+ hosts
deoR: Constitutive synthesis of deoxyribose, allows uptake of large plasmids
relA1: Eliminates stringency control, allows high-copy replication of plasmids
13
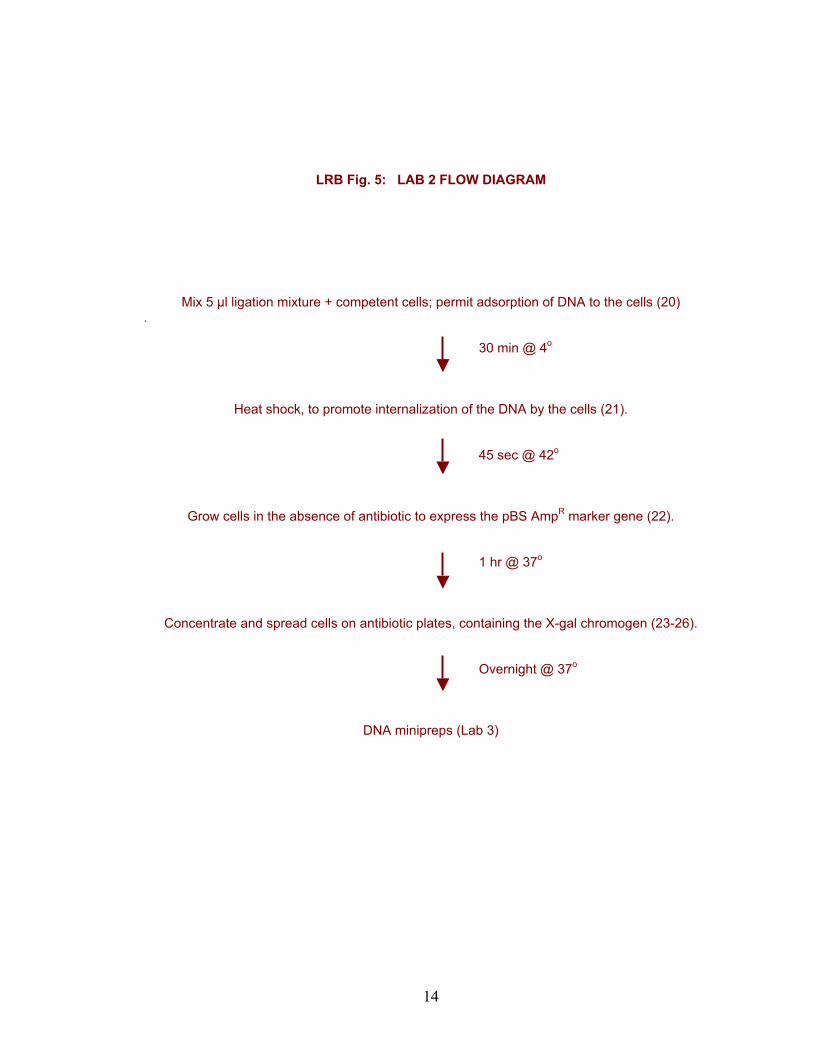
LRB Fig. 5: LAB 2 FLOW DIAGRAM Mix 5 µl ligation mixture + competent cells; permit adsorption of DNA to the cells (20) .
30 min @ 4o Heat shock, to promote internalization of the DNA by the cells (21). 45 sec @ 42o
Grow cells in the absence of antibiotic to express the pBS AmpR marker gene (22).
1 hr @ 37o Concentrate and spread cells on antibiotic plates, containing the X-gal chromogen (23-26).
Overnight @ 37o
DNA minipreps (Lab 3)
14
LRB LAB 3: DNA Miniprep & Restriction Analysis
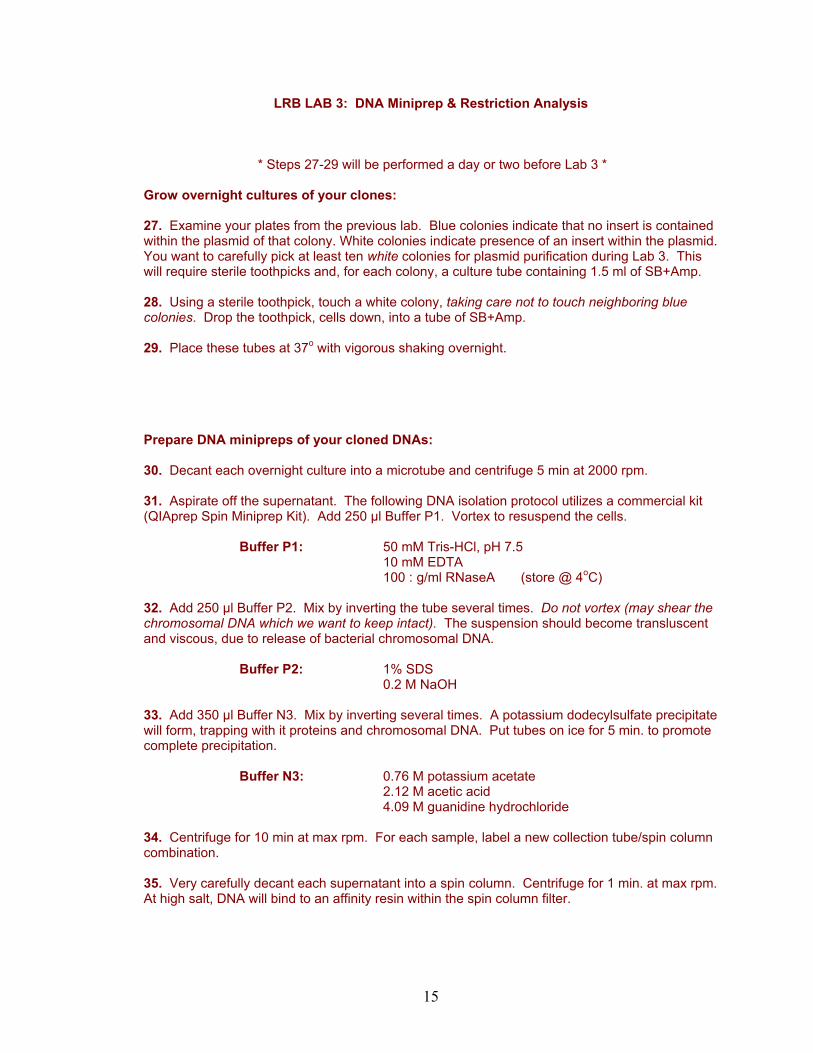
* Steps 27-29 will be performed a day or two before Lab 3 * Grow overnight cultures of your clones: 27. Examine your plates from the previous lab. Blue colonies indicate that no insert is contained within the plasmid of that colony. White colonies indicate presence of an insert within the plasmid. You want to carefully pick at least ten white colonies for plasmid purification during Lab 3. This will require sterile toothpicks and, for each colony, a culture tube containing 1.5 ml of SB+Amp. 28. Using a sterile toothpick, touch a white colony, taking care not to touch neighboring blue colonies. Drop the toothpick, cells down, into a tube of SB+Amp. 29. Place these tubes at 37o with vigorous shaking overnight. Prepare DNA minipreps of your cloned DNAs: 30. Decant each overnight culture into a microtube and centrifuge 5 min at 2000 rpm. 31. Aspirate off the supernatant. The following DNA isolation protocol utilizes a commercial kit (QIAprep Spin Miniprep Kit). Add 250 µl Buffer P1. Vortex to resuspend the cells. Buffer P1: 50 mM Tris-HCl, pH 7.5 10 mM EDTA 100 :g/ml RNaseA (store @ 4oC) 32. Add 250 µl Buffer P2. Mix by inverting the tube several times. Do not vortex (may shear the chromosomal DNA which we want to keep intact). The suspension should become transluscent and viscous, due to release of bacterial chromosomal DNA. Buffer P2: 1% SDS 0.2 M NaOH 33. Add 350 µl Buffer N3. Mix by inverting several times. A potassium dodecylsulfate precipitate will form, trapping with it proteins and chromosomal DNA. Put tubes on ice for 5 min. to promote complete precipitation. Buffer N3: 0.76 M potassium acetate 2.12 M acetic acid 4.09 M guanidine hydrochloride 34. Centrifuge for 10 min at max rpm. For each sample, label a new collection tube/spin column combination. 35. Very carefully decant each supernatant into a spin column. Centrifuge for 1 min. at max rpm. At high salt, DNA will bind to an affinity resin within the spin column filter.
15
36. Discard the flowthrough from the bottom of each microtube and return the same spin column to the microtube. Add 750 µl PE to each spin column. Centrifuge for 1 min. at max rpm. This will wash unbound material through the spin column filter. Buffer PE: 60 mM potassium acetate 10 mM Tris-HCl, pH 7.5 60% ethanol 37. Centrifuge again for 2 min. at max rpm to eliminate all flowthrough. 38. Transfer each spin filter to a new pop-top microtube. Place 50 µl TE into each spin filter and centrifuge for 30 seconds at max rpm. Under this low salt condition, DNA passes through the filter. Discard the spin filter. The flowthrough contains your plasmid DNA sample in 50 µl. Restriction analysis of your cloned DNAs: 39. For each plasmid sample, label a new microtube and prepare a restriction digest using the same enzyme that you used in Step #2. Each microtube should receive 1 µl 10X REACT buffer, 1 µl DNA, 0.5 µl enzyme, and H2O to 10 µl final volume. Incubate these reactions in a 37o water bath for 1 hr. You should also prepare parallel digests of λ DNA with the same enzyme using 1 µl of λ DNA. Store your DNA samples at 4o until the next lab. 40. During incubation of your samples, prepare a 1% agarose gel. After the incubation, add 2 µl loading dye to each sample, load the samples into the gel, and carry out electrophoresis as described in steps 5 through 8 above. 41. Consulting your gel results from the First Laboratory along with Fig. 1, Fig. 2 and Table 1, interpret your new gel results. The BIG QUESTION: Can you identify which λ fragment(s) you have cloned?
16
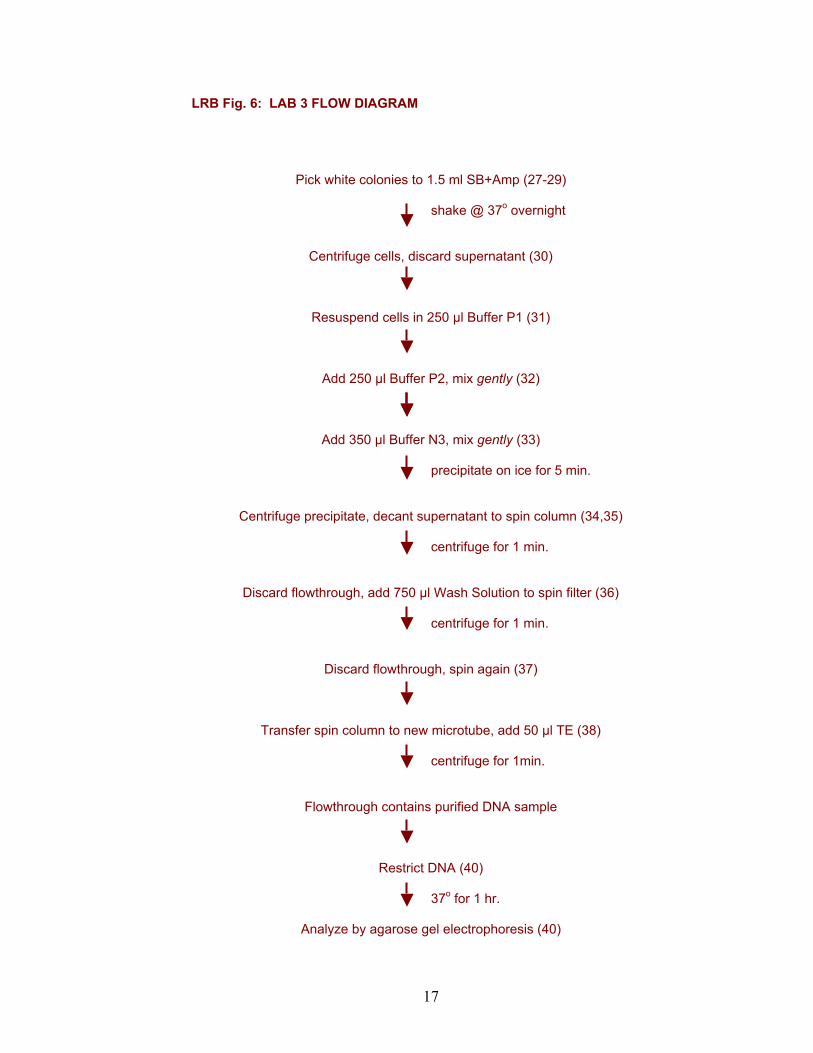
LRB Fig. 6: LAB 3 FLOW DIAGRAM
Pick white colonies to 1.5 ml SB+Amp (27-29) shake @ 37o overnight
Centrifuge cells, discard supernatant (30)
Resuspend cells in 250 µl Buffer P1 (31)
Add 250 µl Buffer P2, mix gently (32)
Add 350 µl Buffer N3, mix gently (33) precipitate on ice for 5 min.
Centrifuge precipitate, decant supernatant to spin column (34,35) centrifuge for 1 min.
Discard flowthrough, add 750 µl Wash Solution to spin filter (36)
centrifuge for 1 min.
Discard flowthrough, spin again (37)
Transfer spin column to new microtube, add 50 µl TE (38) centrifuge for 1min.
Flowthrough contains purified DNA sample
Restrict DNA (40) 37o for 1 hr.
Analyze by agarose gel electrophoresis (40)
17
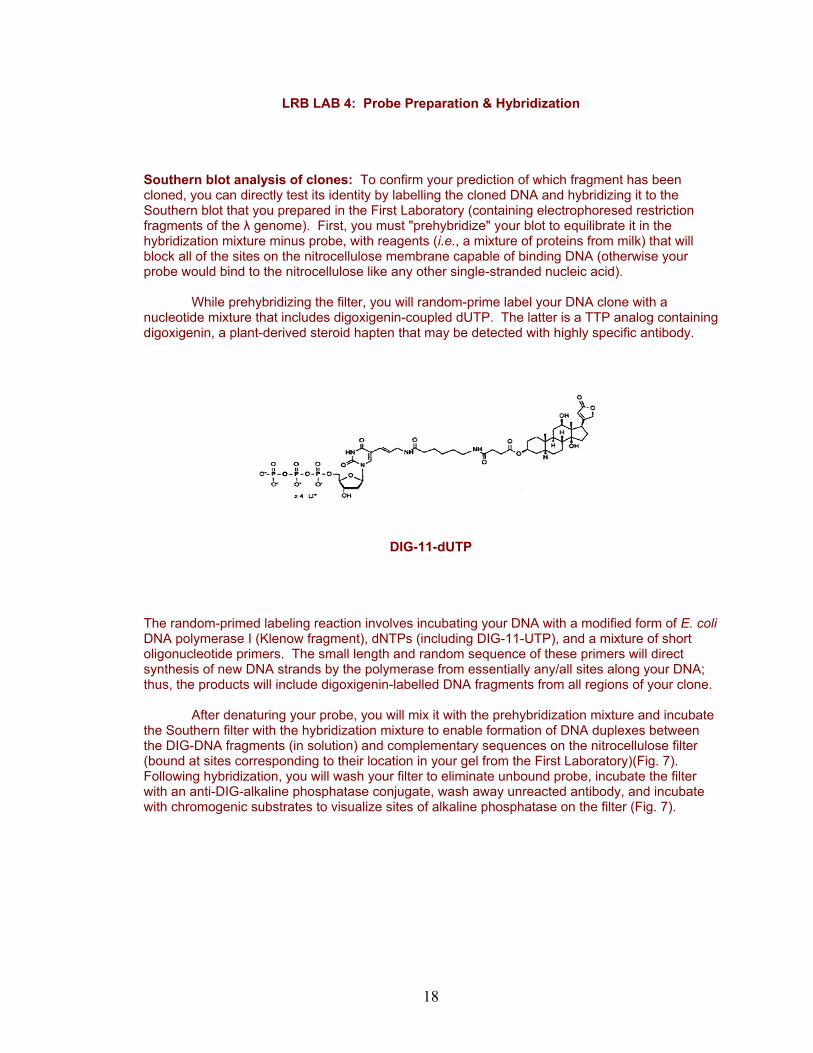
LRB LAB 4: Probe Preparation & Hybridization Southern blot analysis of clones: To confirm your prediction of which fragment has been cloned, you can directly test its identity by labelling the cloned DNA and hybridizing it to the Southern blot that you prepared in the First Laboratory (containing electrophoresed restriction fragments of the λ genome). First, you must "prehybridize" your blot to equilibrate it in the hybridization mixture minus probe, with reagents (i.e., a mixture of proteins from milk) that will block all of the sites on the nitrocellulose membrane capable of binding DNA (otherwise your probe would bind to the nitrocellulose like any other single-stranded nucleic acid). While prehybridizing the filter, you will random-prime label your DNA clone with a nucleotide mixture that includes digoxigenin-coupled dUTP. The latter is a TTP analog containing digoxigenin, a plant-derived steroid hapten that may be detected with highly specific antibody.
DIG-11-dUTP The random-primed labeling reaction involves incubating your DNA with a modified form of E. coli DNA polymerase I (Klenow fragment), dNTPs (including DIG-11-UTP), and a mixture of short oligonucleotide primers. The small length and random sequence of these primers will direct synthesis of new DNA strands by the polymerase from essentially any/all sites along your DNA; thus, the products will include digoxigenin-labelled DNA fragments from all regions of your clone. After denaturing your probe, you will mix it with the prehybridization mixture and incubate the Southern filter with the hybridization mixture to enable formation of DNA duplexes between the DIG-DNA fragments (in solution) and complementary sequences on the nitrocellulose filter (bound at sites corresponding to their location in your gel from the First Laboratory)(Fig. 7). Following hybridization, you will wash your filter to eliminate unbound probe, incubate the filter with an anti-DIG-alkaline phosphatase conjugate, wash away unreacted antibody, and incubate with chromogenic substrates to visualize sites of alkaline phosphatase on the filter (Fig. 7).
18
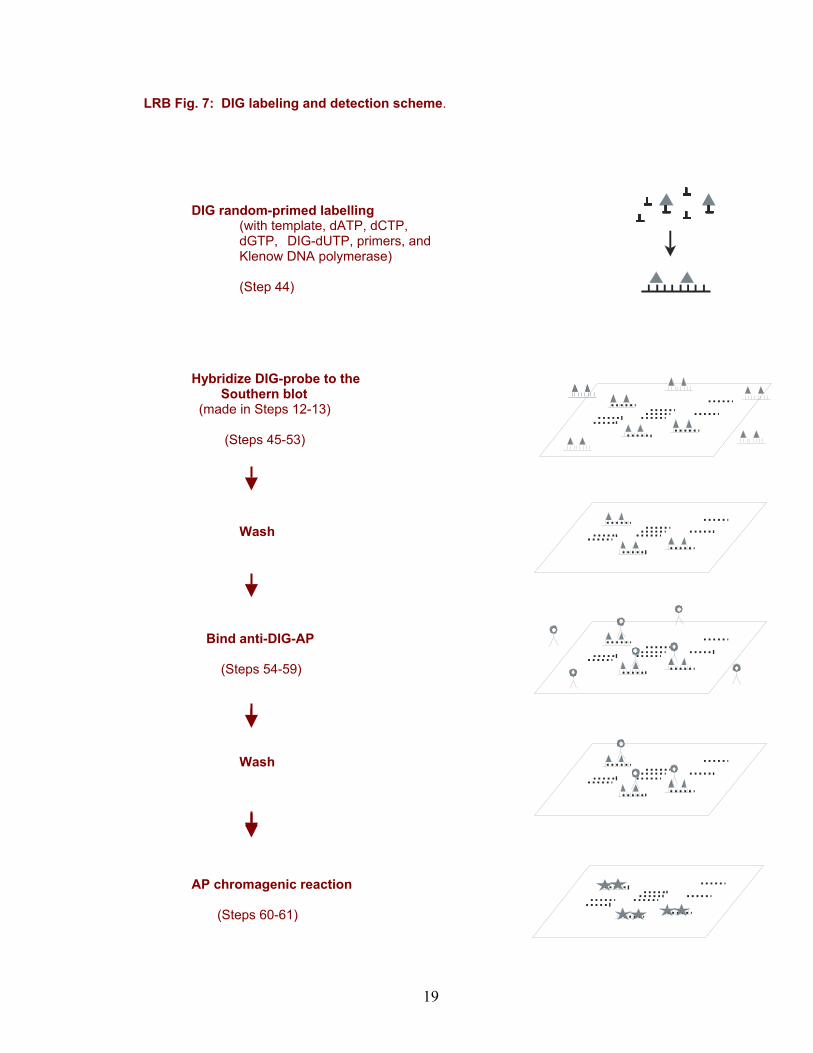
LRB Fig. 7: DIG labeling and detection scheme. DIG random-primed labelling
(with template, dATP, dCTP, dGTP, DIG-dUTP, primers, and Klenow DNA polymerase) (Step 44) Hybridize DIG-probe to the Southern blot (made in Steps 12-13) (Steps 45-53) Wash Bind anti-DIG-AP (Steps 54-59) ↓ Wash AP chromagenic reaction (Steps 60-61)
19
Probe Labelling:
* Step 44 will be set up earlier in the week of Lab 4 * 44. Carry out random-primed digoxigenin labeling of your clone by setting up the following reaction: a. Add 1 µl of your cloned DNA sample to 15 µl H2O in a new microtube. b. Cap and place the tube in a boiling water bath for 10 min; quickly chill in an ice/NaCl bath. c. Add 4 µl 5X labelling mix, mix, centrifuge briefly, and incubate at 37o until the lab. 5X labeling mix: 0.5 M HEPES-NaOH, pH 6.6 50 mM MgCl2 150 ng random primers/�l 1 mM dATP, dCTP, dGTP 0.65 mM dTTP 0.35 mM DIG-11-UTP 1 unit Klenow fragment/µl Hybridization: 45. Place your Southern blot in a roller tube and add 25 ml of prehybridization mixture. Prehybridization solution: 5X SSC 50% formamide 0.1% N-laurylsarcosine 0.02% SDS 1% nonfat dried milk proteins Cap the roller tube and rotate it at 42o for at least one hour. 46. Stop the labeling reaction (step #44) by placing the microtube in a boiling water bath for 10 min. This inactivates the enzyme and denatures the DNA probe. Quickly plunge the microtube into an ice bath to prevent renaturation of the probe. 47. Prepare hybridization mixture by adding all of the denatured probe to 10 ml of pre-warmed prehybridization mixture. Mix, but avoid bubbles. 48. Decant the prehybridization mixture from the roller tube containing your Southern blot and replace it with the hybridization mixture. Cap the roller tube and roll it around by hand to evenly distribute the hybridization mixture throughout the membrane. 49. Rotate the roller tube at 42o overnight. It will be removed the next day and stored for you until the next lab period.
20
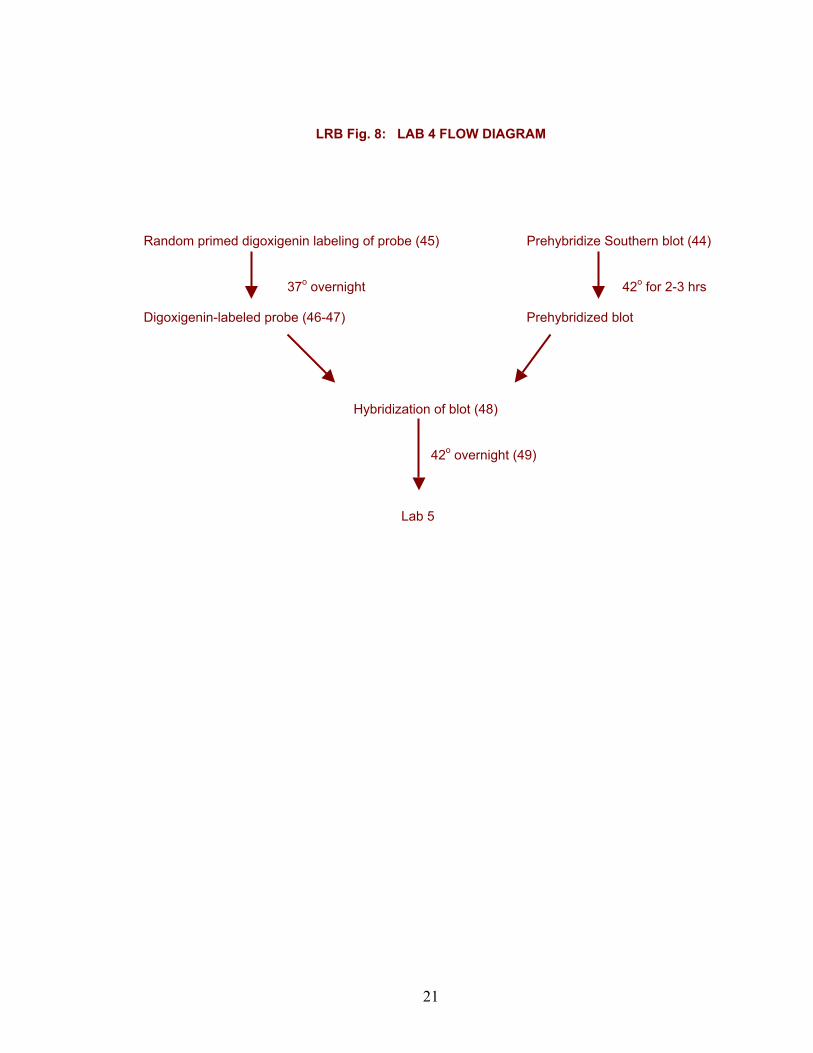
LRB Fig. 8: LAB 4 FLOW DIAGRAM Random primed digoxigenin labeling of probe (45) Prehybridize Southern blot (44) 37o overnight 42o for 2-3 hrs Digoxigenin-labeled probe (46-47) Prehybridized blot Hybridization of blot (48) 42o overnight (49) Lab 5
21
LRB LAB 5: Detection of Hybridizing Bands 50. Decant the hybridization mixture from the roller tube (it can be saved for repeated use) and replace it with 50 ml of 2X SSC + 0.1% SDS. Cap the roller tube and rotate it for 5 min. 51. Discard the liquid in the roller tube and replace it with 50 ml of the same. Cap the roller tube and rotate it for another 5 min. These washes will remove unbound probe. 52. Remove the membrane from the roller tube, transferring it to a sealable bag. Add 50 ml of 0.1X SSC + 0.1% SDS. Seal and place the bag in a 68o waterbath for 15 min. 53. Discard the liquid in the bag and replace it with 50 ml of the same. Seal and resume the 68o incubation for another 15 min. These high stringency washes will denature imperfect DNA duplex hybrids that may have been formed, leaving only fully complementary duplexes. 54. Discard the liquid in the bag and carefully remove the membrane from the bag, placing it into a plastic dish containing 50 ml maleic acid buffer. Rock gently for 5 min. at room temperature. Maleic acid buffer: 0.1 M maleic acid 0.15 M NaCl adjusted to pH 7.5 with NaOH 55. Discard the maleic acid buffer and replace it with 100 ml of blocking solution. Rock gently for 30 min. at room temperature. Blocking solution: 1% nonfat dried milk proteins in maleic acid buffer 56. Dilute anti-DIG-alkaline phosphatase conjugate to 150 U/ml (1:5000) in blocking solution. 57. Discard the blocking solution from the plastic tray and replace it with 20 ml of the antibody solution. Gently rock for 20 min. at room temperature. 58. Remove the antibody solution and wash the membrane twice with 100 ml maleic acid buffer for 15 min. 59. Remove the maleic acid buffer and equilibrate the membrane in 20 ml of detection buffer for 5 min. Detection buffer: 0.1 M Tris-HCl, pH 9.5 0.1 M NaCl 50 mM MgCl2 60. Remove the detection buffer and replace with 10 ml freshly prepared color solution. Seal the plastic tray and maintain in the dark during color development. Do not shake.
Color solution: 0.1% BCIP (5-bromo-4-chloro-3-indolyl phosphate, toluidinium salt) 0.15% NBT (nitroblue tetrazolium) in detection buffer 61. When distinctive bands are achieved, stop the reaction by washing the membrane with 50 ml H2O. The membrane may be photographed. 22
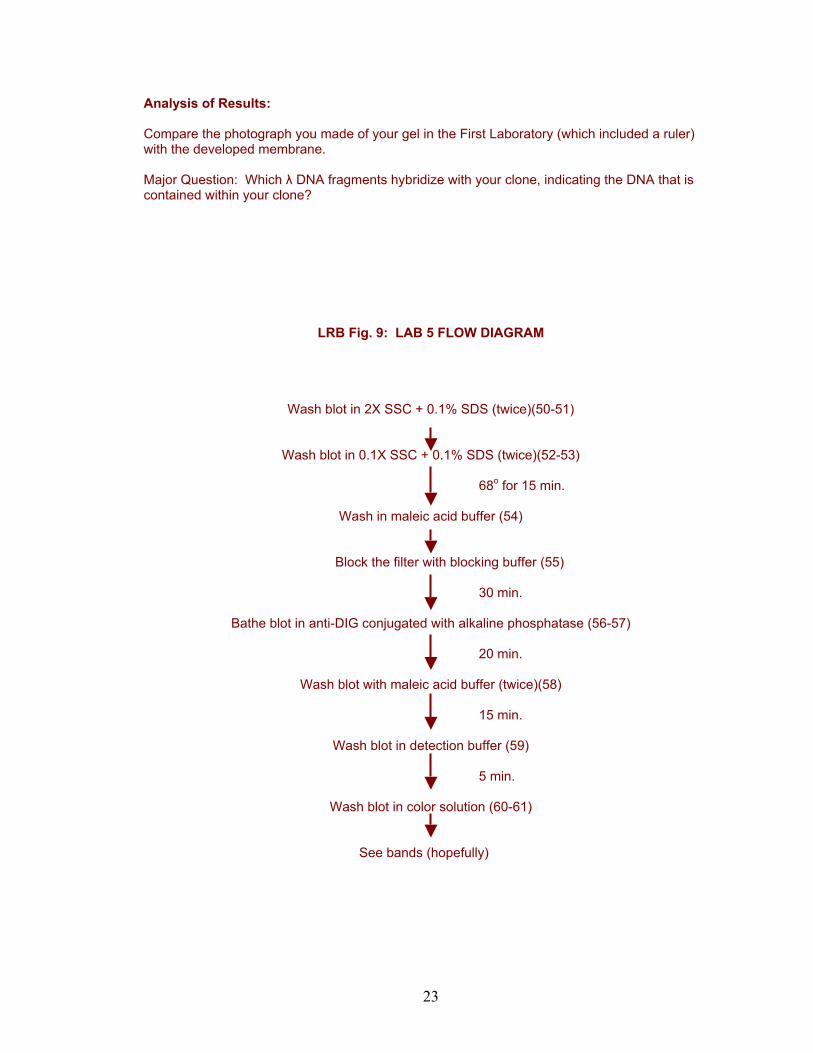
Analysis of Results: Compare the photograph you made of your gel in the First Laboratory (which included a ruler) with the developed membrane. Major Question: Which λ DNA fragments hybridize with your clone, indicating the DNA that is contained within your clone?
LRB Fig. 9: LAB 5 FLOW DIAGRAM
Wash blot in 2X SSC + 0.1% SDS (twice)(50-51)
Wash blot in 0.1X SSC + 0.1% SDS (twice)(52-53)
68o for 15 min.
Wash in maleic acid buffer (54)
Block the filter with blocking buffer (55) 30 min.
Bathe blot in anti-DIG conjugated with alkaline phosphatase (56-57)
20 min.
Wash blot with maleic acid buffer (twice)(58)
15 min.
Wash blot in detection buffer (59)
5 min.
Wash blot in color solution (60-61)
See bands (hopefully)
23
24
Outline for Lab Report A: Lambda restriction & cloning
BIO 410 I. Introduction and Background (one-page limit) Provide a brief summary of the λ genome and an overview of experimental strategies. II. Specific Aims Concise list of the objectives of these experiments; can be a numbered list of single sentences. III. Experimental Methods & Results Describe what you did and present the results of those experiments. Experimental detail found in this lab manual need not be repeated. You will have to note your particular methods, however (e.g., which restriction enzymes did you use). Include figures and tables presenting your results (e.g., gel photos, Southern blot image, tables of fragment sizes). One of the figures should be a semi-log plot of fragment size vs. mobility. IV. Conclusions & Discussion (one and one-half page limit) Self-explanatory. What fragments did you clone among each of your picks? What is the identity of the clone you tested by hybridization and what results support that conclusion? A figure may be necessary to explain your rationales. V. Recommendations for course improvement Give us three recommendations of means by which these experiments or the course in general can be improved in the future; don't repeat recommendations you gave before.