Reverse Engineering a PlayStation 3 Controller · Reverse Engineering a PlayStation 3 Controller By...
16
Reverse Engineering a PlayStation 3 Controller By the following students: Ryan Foxworth Omar Halabi Juan Lopez Marcano Justin Parker Seng Loong Yu February 18 th , 2014 EEL 4906: Engineering Design and Professionalism Professor David Fries
Transcript of Reverse Engineering a PlayStation 3 Controller · Reverse Engineering a PlayStation 3 Controller By...
Reverse Engineering a PlayStation 3 Controller
By the following students:
Ryan Foxworth
Omar Halabi
Juan Lopez Marcano
Justin Parker
Seng Loong Yu
February 18th, 2014
EEL 4906: Engineering Design and Professionalism
Professor David Fries
Page 1
Introduction
Our senior design project is a vest, which we call Ωmega Vest, which will make the experience of movies more interactive. More specifically, we are interested in creating vibrations, using compressed air, and injecting environmental scents into the air, to make movies more immersive. Unfortunately, there are not many consumer products that parallel our project. Theme park companies like Disney, make their own products for their rides or other entertainment purposes. Although there are some products that are very similar to our project, such as the 3 rd Space Vest, and various Kick Starter projects, there is almost no information that has been released about their design or technical specifications. For these reasons, we decided to reverse engineer a product that is similar to our own project in at least one area, that is also readily available, and whose technical specifications are accessible. Thus, we chose the PlayStation 3 controller.
The PlayStation controller, also known as DualShock 3, contains a highly integrated system that caught our attention. It contains an array of sensors, buttons, and vibration motors. We find the latter the most interesting about the controller. Also, another incentive to use this controller is that it communicates with the gaming console via Bluetooth; we are considering adding Bluetooth capabilities to the Ωmega vest, should time permit.
Researching and reverse engineering the PS3 controller was an interesting and valuable experience for electrical engineering students. Although we had to use YouTube to see someone disassembling the controller, since none of has one, we reverse-engineered the device by seeing where the buttons were connected and how the wiring was made. We also found circuit schematics from Mod and Maker communities to guide us through the process, and obtain values for the circuit components comprising the system.
Overview of the PlayStation 3 Controller
The DualShock 3 is the main human input device (HID) for the PlayStation 3. Sony originally released it in 2006, but it did not contain vibration motors during that time. In 2007, Sony was absolved from patent issues regarding the vibration motors of the DualShock 2 (HID of the PlayStation 2), which allowed Sony to release a new version of the DualShock 3 containing vibration motors[1].
The DualShock 3 weighs approximately 192 grams, and its dimensions are approximately 6.20 in × 3.78 in × 2.20 in (length x width x height), which makes the controller a handheld device. It communicates with the PlayStation 3 via Bluetooth, and as of 2007, it was one of the few gaming controllers that could be connected to a PC.
Page 2
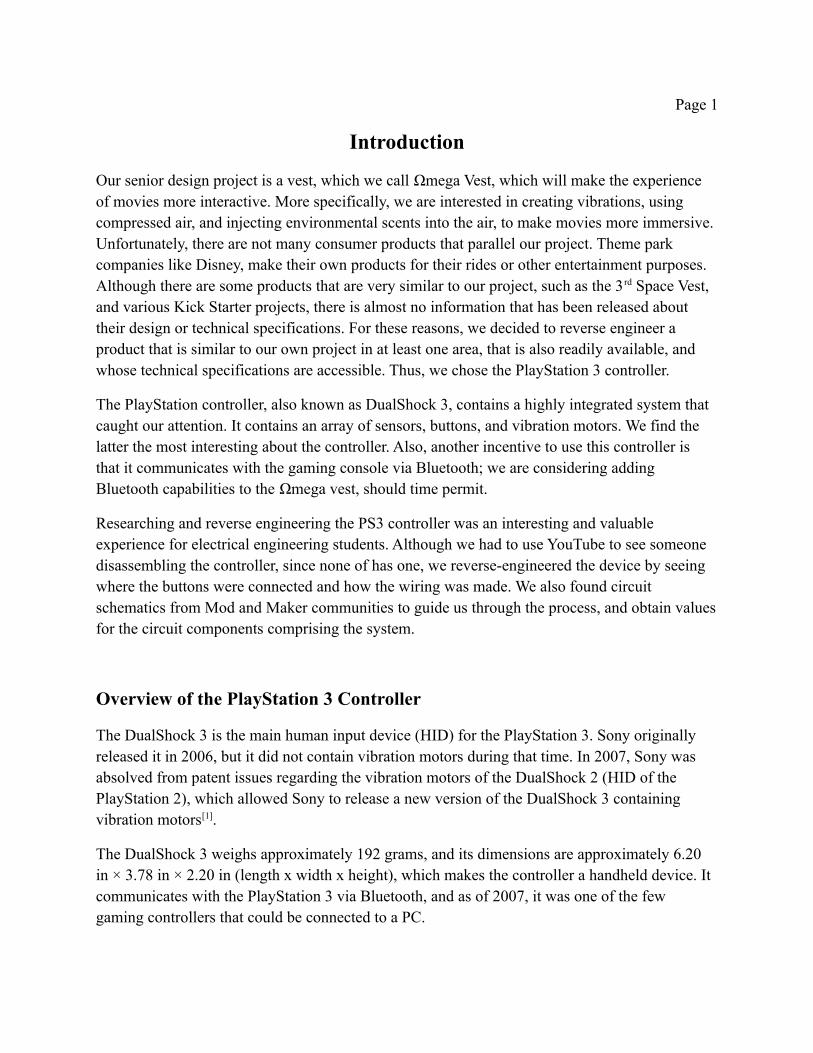
Figure 1: Outside View of Consumer Device
Tech Specs:
- Power: Up to 300 mA at 3.7 V (lithium-ion battery) or 5.0 V at 500mA (USB powered).[1]
- Motion sensing: 6-axes sensing (tri-axis accelerometer and tri-axis gyroscope)[1]
- 2× Analog sticks (10-bit precision)[1]
- 2× Analog triggers[1]
- 6× Pressure-sensitive buttons[1]
- Pressure-sensitive directional buttons[1]
- 5× Digital buttons[1]
- 2x Vibration motors
- Toshiba microprocessor with bluetooth stack[1]
Cost Analysis:
Page 3
Since the PlayStation 3 controller is not the main source of entertainment of the PlayStation console, we were not able to find the official parts that comprise the controller. However, we were able to find the cost of repairs for the vibration motors and analog joysticks, and the cost of an MPU-650 Accelerometer & Gyroscope module, and that of a Bluetooth dongle or adapter. Finally, we estimated the cost of packaging and PCB.
Price Per Part Table
$38.03 is the total price for the parts. The retail MSRP price is $54.99.
Dissecting the Controller
Since none of the members of the group owns a PlayStation 3 controller to disassemble, we had to find pictures of the PCB from both views, a schematic of the circuit, and watch a video of someone tearing down a PlayStation 3 controller to obtain a better understanding of the circuit design that was originally implemented into the core design of the consumer product.
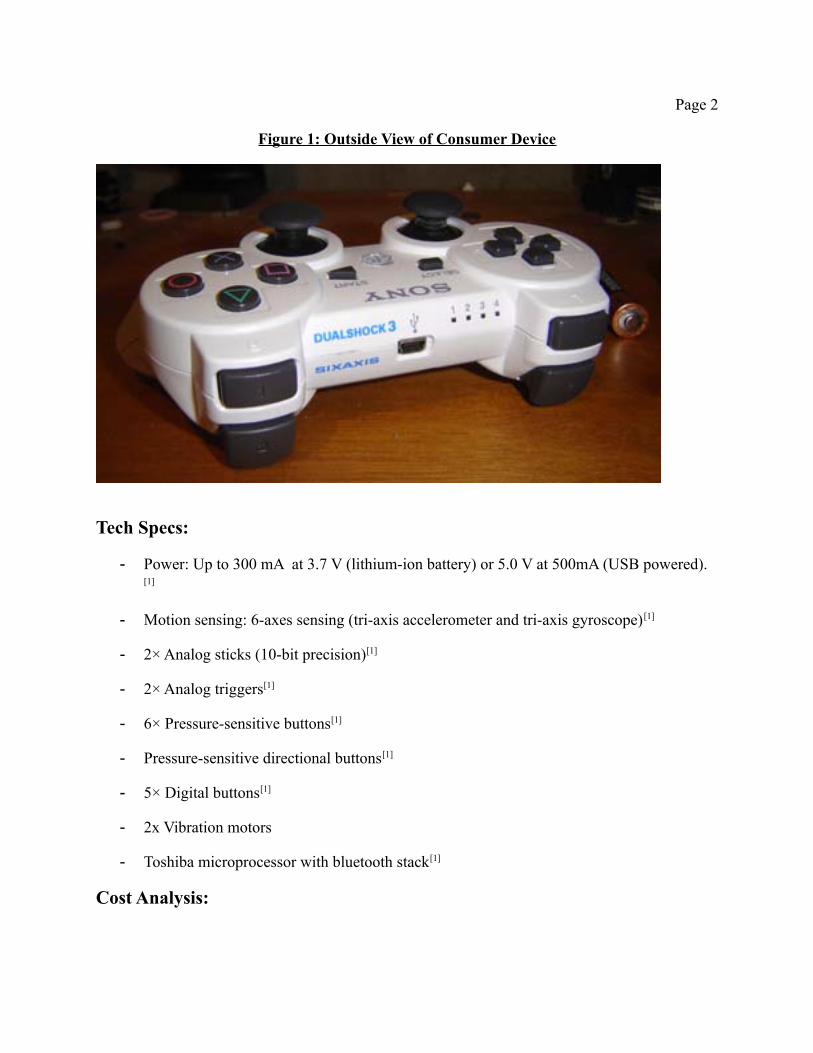
In order to formulate any conclusive thoughts concerning the design of the DualShock3 controller, one must first be able to intrinsically analyze the schematic diagram. Here is the schematic diagram for the PS3 controller circuit:
Page 4
Figure 2: Circuit Schematic
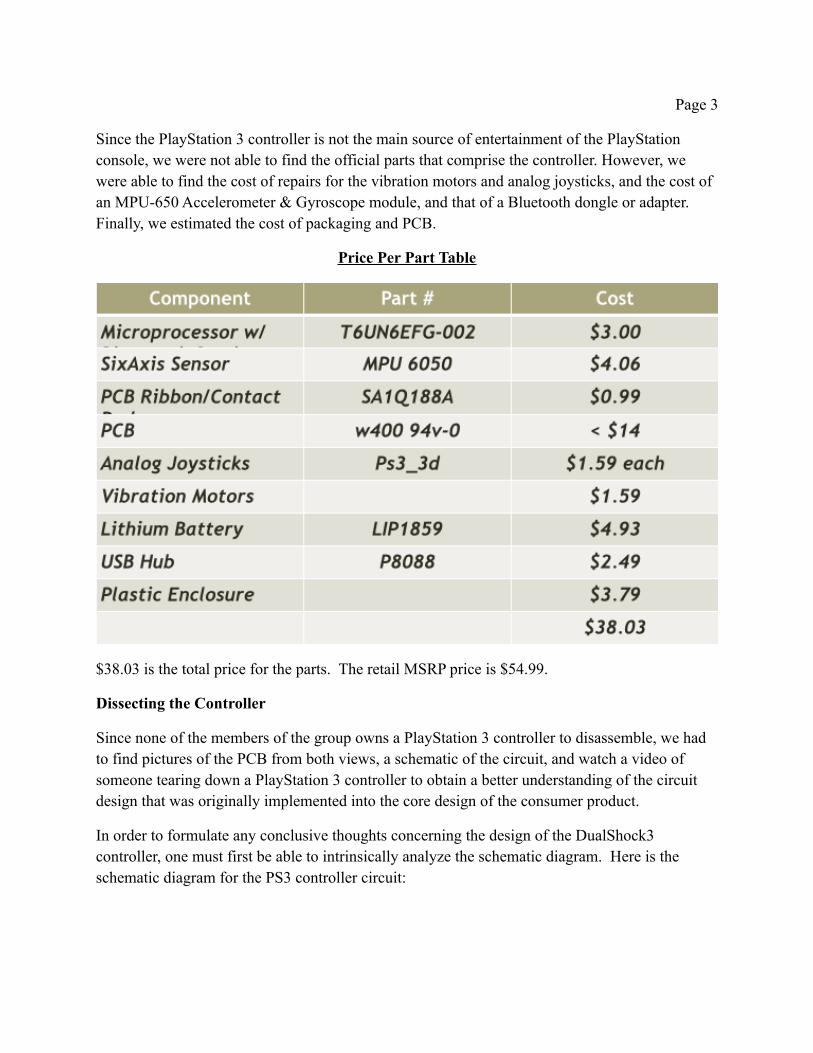
After removing the back of the Playstation 3 controller, we were able to view the battery pack, the vibration motors, and the circuit board. Here is an image of that:
Figure 3: PS3 Controller with No Backplate

Page 5
Figure 4 shows the top view of the controller once the packaging has been taken apart.
Figure 4: Top View of Circuit
At this point, we could easily identify the buttons and the mechanical parts of the PlayStation 3 controller. Then, when the joysticks, triggers, and button pad were taken apart, we were left with a circuit that we could identify what each of the pins were used for. In figure 5, we have the circuit and the multiplexer connection for the Playstation 3 controller.
Figure 5: Circuit & Multiplexer Connection Diagram
Page 6
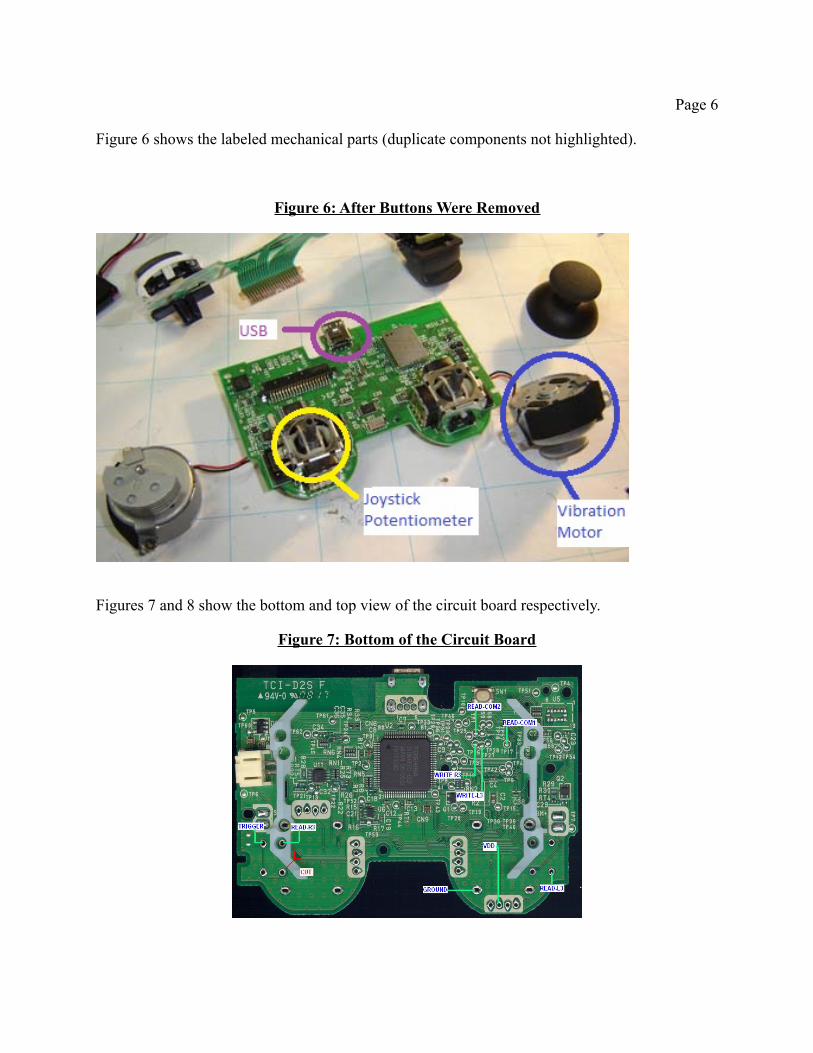
Figure 6 shows the labeled mechanical parts (duplicate components not highlighted).
Figure 6: After Buttons Were Removed
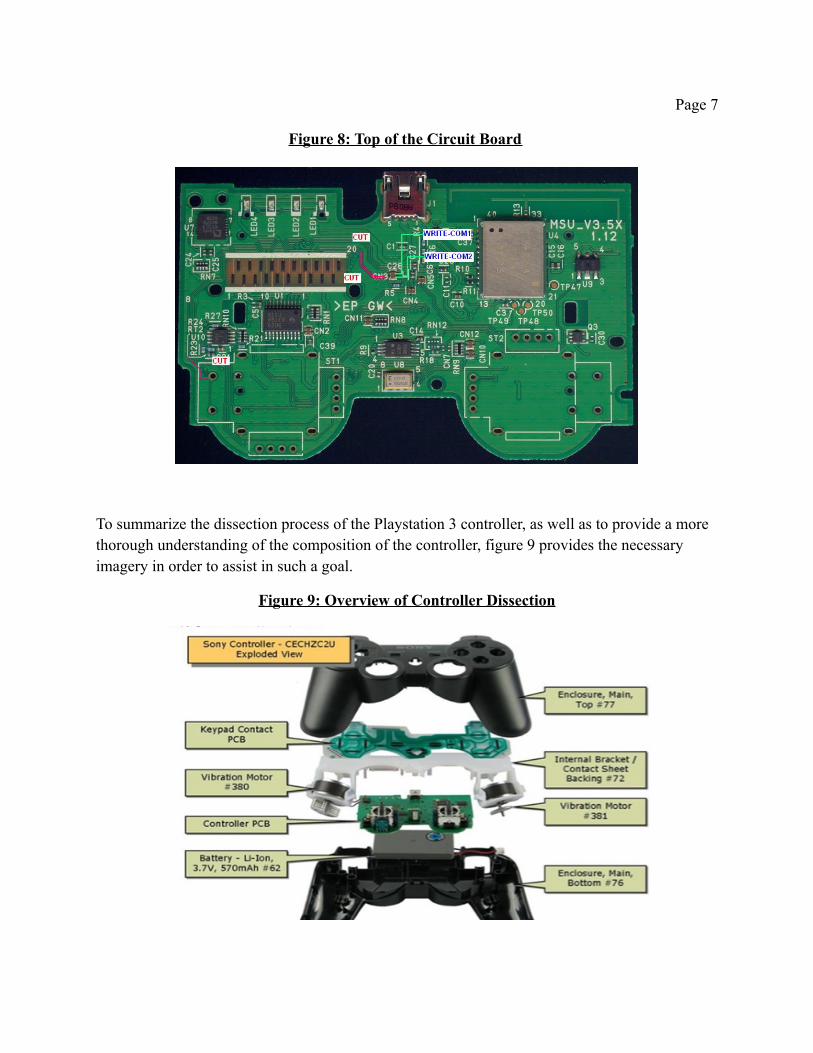
Figures 7 and 8 show the bottom and top view of the circuit board respectively.
Figure 7: Bottom of the Circuit Board
Page 7
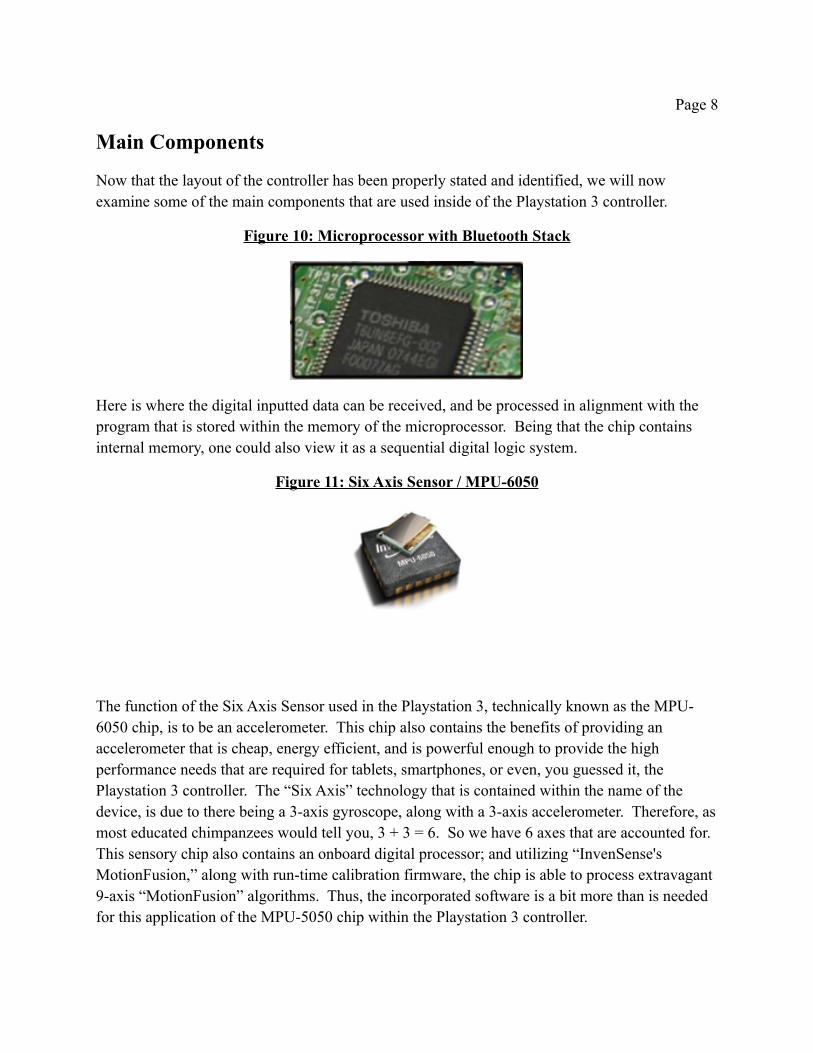
Figure 8: Top of the Circuit Board
To summarize the dissection process of the Playstation 3 controller, as well as to provide a more thorough understanding of the composition of the controller, figure 9 provides the necessary imagery in order to assist in such a goal.
Figure 9: Overview of Controller Dissection
Page 8
Main Components
Now that the layout of the controller has been properly stated and identified, we will now examine some of the main components that are used inside of the Playstation 3 controller.
Figure 10: Microprocessor with Bluetooth Stack
Here is where the digital inputted data can be received, and be processed in alignment with the program that is stored within the memory of the microprocessor. Being that the chip contains internal memory, one could also view it as a sequential digital logic system.
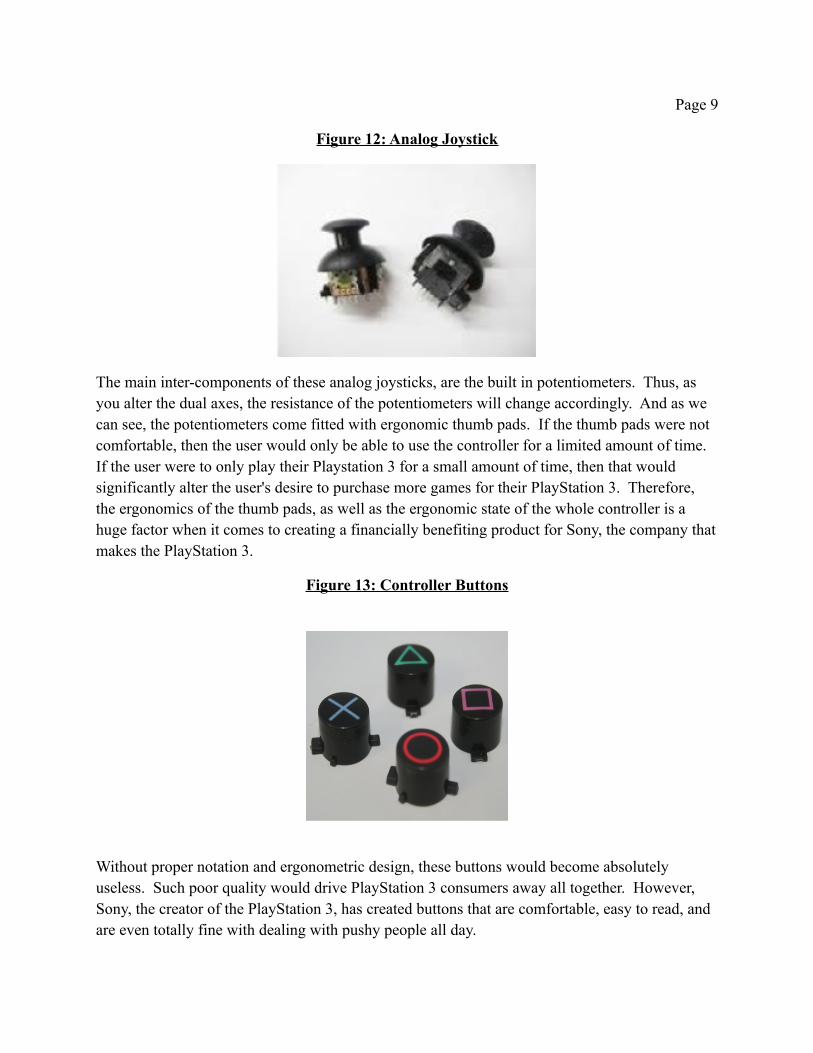
Figure 11: Six Axis Sensor / MPU-6050
The function of the Six Axis Sensor used in the Playstation 3, technically known as the MPU-6050 chip, is to be an accelerometer. This chip also contains the benefits of providing an accelerometer that is cheap, energy efficient, and is powerful enough to provide the high performance needs that are required for tablets, smartphones, or even, you guessed it, the Playstation 3 controller. The “Six Axis” technology that is contained within the name of the device, is due to there being a 3-axis gyroscope, along with a 3-axis accelerometer. Therefore, as most educated chimpanzees would tell you, 3 + 3 = 6. So we have 6 axes that are accounted for. This sensory chip also contains an onboard digital processor; and utilizing “InvenSense's MotionFusion,” along with run-time calibration firmware, the chip is able to process extravagant 9-axis “MotionFusion” algorithms. Thus, the incorporated software is a bit more than is needed for this application of the MPU-5050 chip within the Playstation 3 controller.
Page 9
Figure 12: Analog Joystick
The main inter-components of these analog joysticks, are the built in potentiometers. Thus, as you alter the dual axes, the resistance of the potentiometers will change accordingly. And as we can see, the potentiometers come fitted with ergonomic thumb pads. If the thumb pads were not comfortable, then the user would only be able to use the controller for a limited amount of time. If the user were to only play their Playstation 3 for a small amount of time, then that would significantly alter the user's desire to purchase more games for their PlayStation 3. Therefore, the ergonomics of the thumb pads, as well as the ergonomic state of the whole controller is a huge factor when it comes to creating a financially benefiting product for Sony, the company that makes the PlayStation 3.
Figure 13: Controller Buttons
Without proper notation and ergonometric design, these buttons would become absolutely useless. Such poor quality would drive PlayStation 3 consumers away all together. However, Sony, the creator of the PlayStation 3, has created buttons that are comfortable, easy to read, and are even totally fine with dealing with pushy people all day.
Page 10
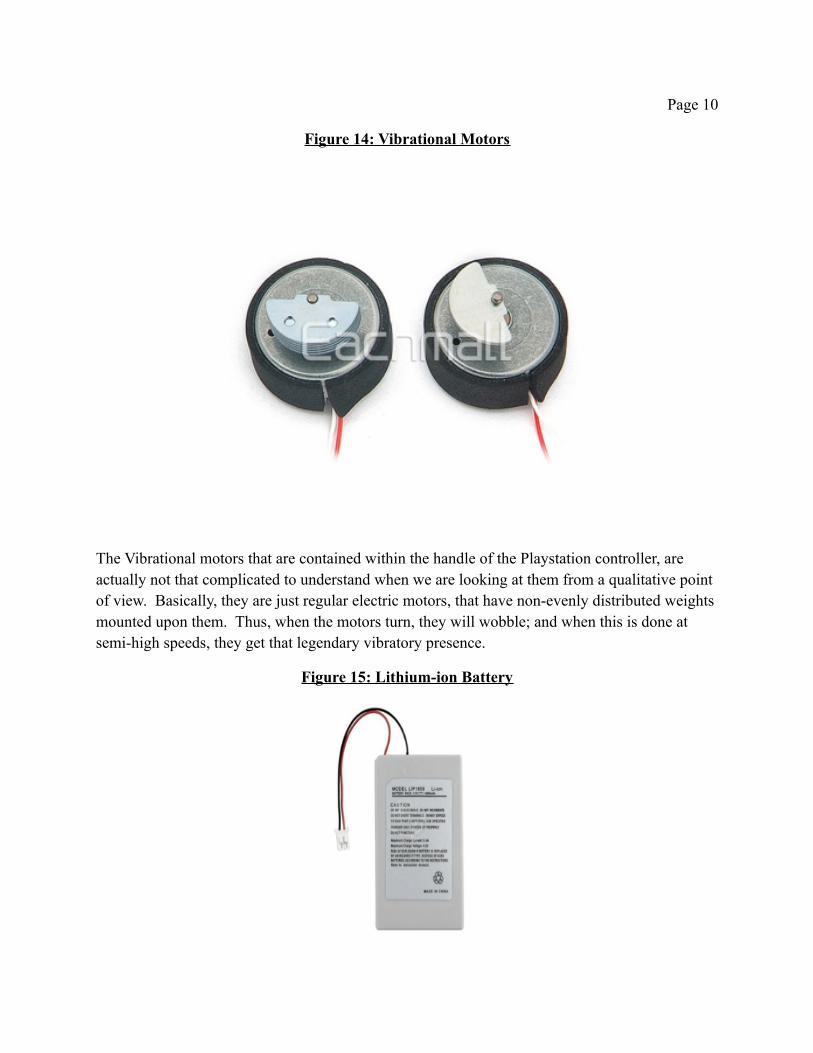
Figure 14: Vibrational Motors
The Vibrational motors that are contained within the handle of the Playstation controller, are actually not that complicated to understand when we are looking at them from a qualitative point of view. Basically, they are just regular electric motors, that have non-evenly distributed weights mounted upon them. Thus, when the motors turn, they will wobble; and when this is done at semi-high speeds, they get that legendary vibratory presence.
Figure 15: Lithium-ion Battery
Page 11
One can get different replacement batteries that range in charge capacity, the one that comes stock with the Playstation 3 controller is 1800 maH. If you do not already know what that means, that means that it can use the battery at 1800 milliamps for 1 hour before it needs to be recharged. And using the associated current to time proportionality laws that are associated with batteries, for instance, we could use the battery at 1000 milliamps for 1.8 Hours.
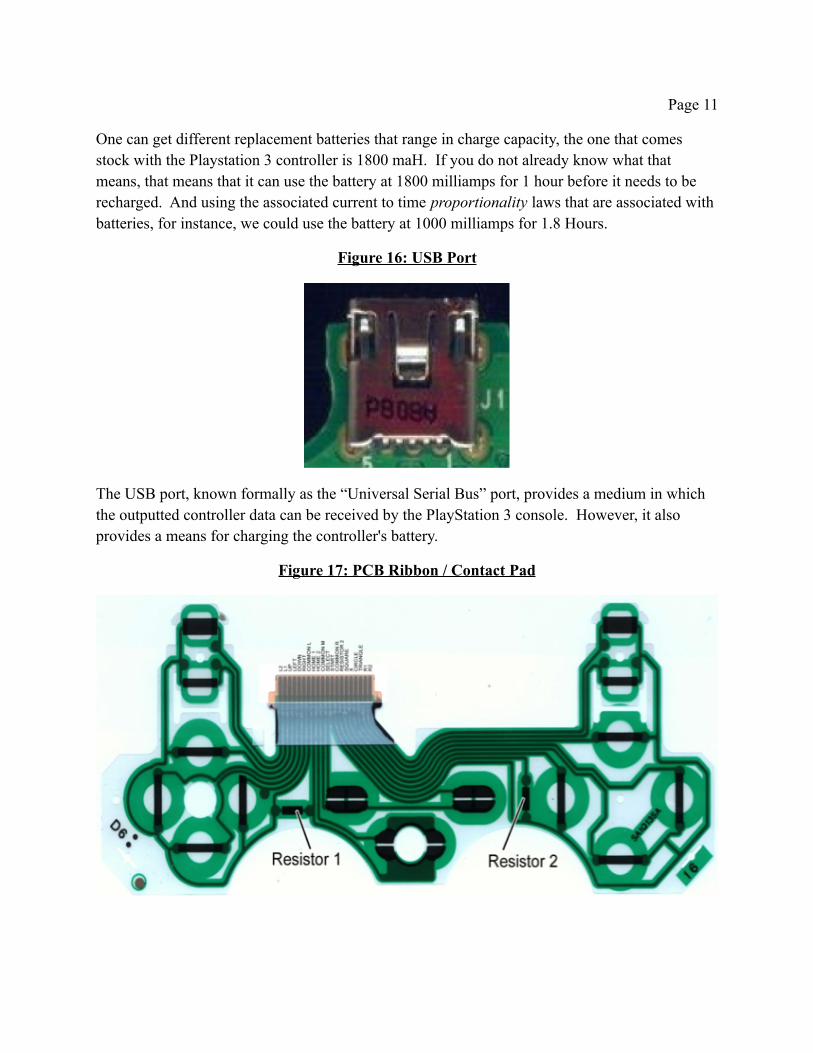
Figure 16: USB Port
The USB port, known formally as the “Universal Serial Bus” port, provides a medium in which the outputted controller data can be received by the PlayStation 3 console. However, it also provides a means for charging the controller's battery.
Figure 17: PCB Ribbon / Contact Pad

Page 12
The purpose of the Contact Pad is to collect the user inputted data: commonly known as “pressing buttons” in this case. The data is then sent through the PCB Ribbon to the multiplexer.
Figure 18: Top of Circuit Board PCB
Here is the PCB board where all of the magic happens. The microprocessor, along with various minor, but much needed, circuit components dwell upon this PCB medium.
Figure 19: Controller Enclosure
The Playstation 3's enclosure design for the controller, is as iconic, as it is, ergonomic. It Provides the user with nothing more, and nothing less: Mastering the technical balance of the needs of the consumer.
Page 13
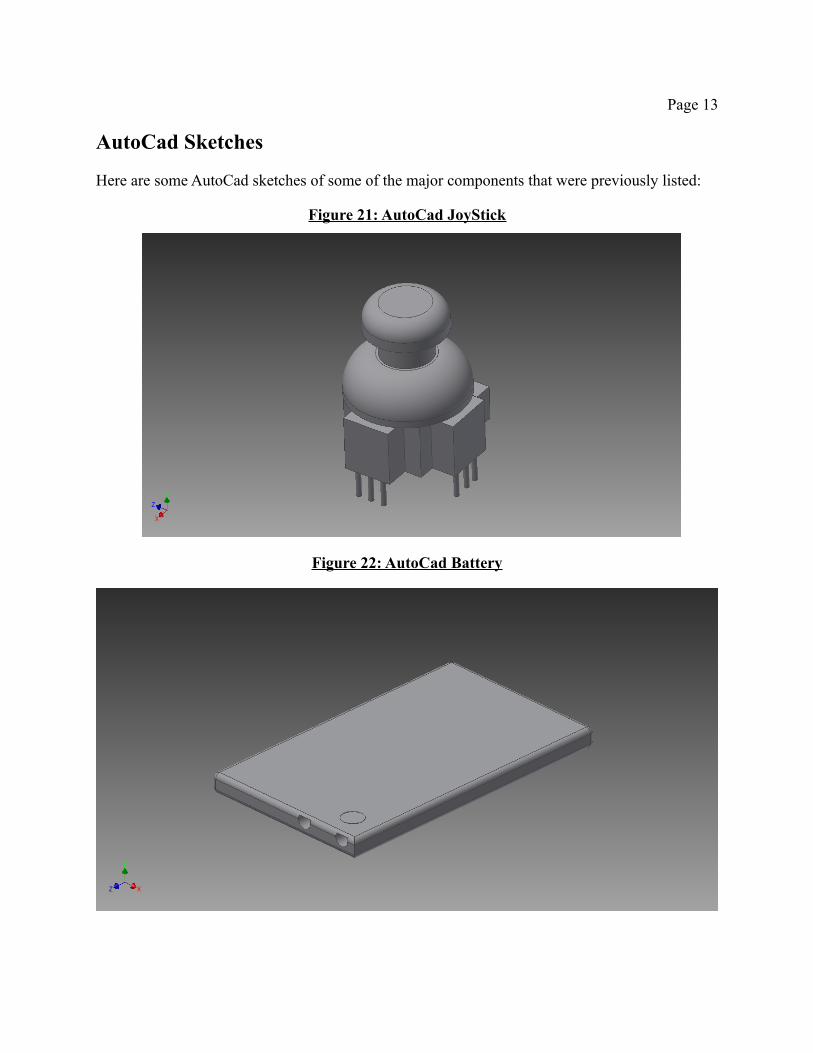
AutoCad Sketches
Here are some AutoCad sketches of some of the major components that were previously listed:
Figure 21: AutoCad JoyStick
Figure 22: AutoCad Battery
Page 14
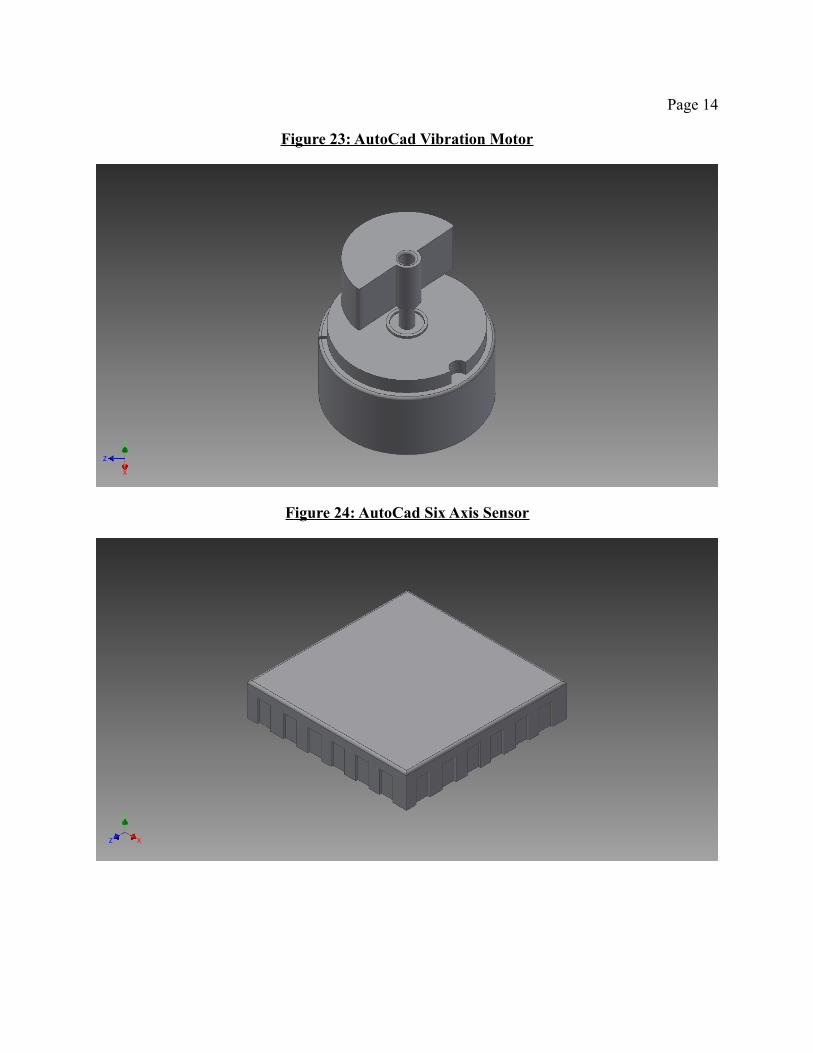
Figure 23: AutoCad Vibration Motor
Figure 24: AutoCad Six Axis Sensor
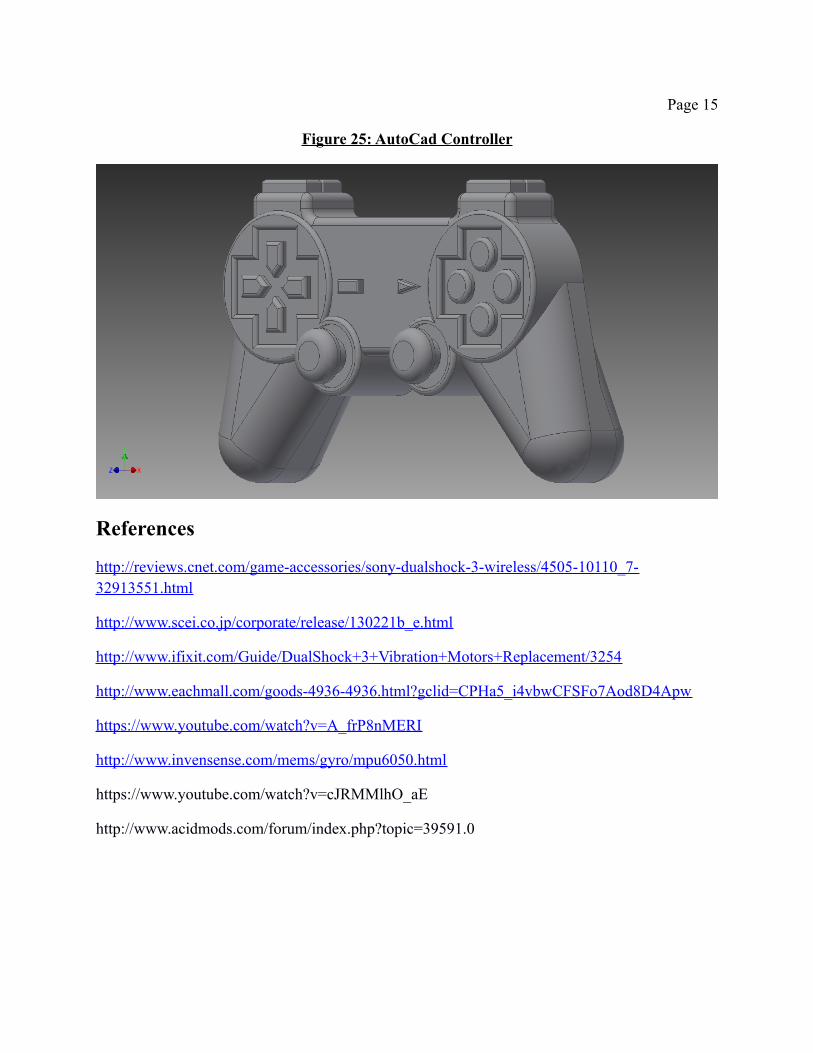
Page 15
Figure 25: AutoCad Controller
References
http://reviews.cnet.com/game-accessories/sony-dualshock-3-wireless/4505-10110_7-32913551.html
http://www.scei.co.jp/corporate/release/130221b_e.html
http://www.ifixit.com/Guide/DualShock+3+Vibration+Motors+Replacement/3254
http://www.eachmall.com/goods-4936-4936.html?gclid=CPHa5_i4vbwCFSFo7Aod8D4Apw
https://www.youtube.com/watch?v=A_frP8nMERI
http://www.invensense.com/mems/gyro/mpu6050.html
https://www.youtube.com/watch?v=cJRMMlhO_aE
http://www.acidmods.com/forum/index.php?topic=39591.0
![EXT-T24-D201 LCD Temperature Controller - …V1.2_22_9_2017].pdf · EXT-T24-D201 LCD Temperature Controller ... LCD temperature controller EXT-T24-D201 provides the foundation for](https://static.fdocument.org/doc/165x107/5a80a5287f8b9a0c748c8809/ext-t24-d201-lcd-temperature-controller-v122292017pdfext-t24-d201-lcd.jpg)